We flew out of Greenville on a Friday morning to Dulles airport where we had a 5 hour layover before boarding our flight to Zurich. Fortunately we have the Chase Sapphire Reserve Card and have been learning more about perks, one of which is free lounge access. So the girls and I had our first airport lounge experience and it’s safe to say we are spoiled now. Comfy places to sit, free food and drinks, and a relaxed atmosphere; David and I basically had a mini date night before the trip even officially started!
Family Ski Trip to Grindelwald Switzerland
Day 1: Travel to Grindelwald
Our plane was delayed due to deicing and we didn’t take off until 2 hours past our scheduled departure. The flight was smooth, though none of us really slept well (expected). When we touched down in Zurich at 9:30 AM local time, we were a bit groggy, but excited. We headed straight to the train station where we were immediately confused. While the trains are certainly a well oiled system, it’s not intuitive when you’re from a different country and there are not many people to ask for help. TIP ALERT: Get the app. We didn’t figure this out until later in our trip and it would have saved us a lot of bumbling around.
It took one short train ride (30 minutes), a long train ride (2 hours 30 minutes), and one last short train ride (30 minutes) for us to get to Grindelwald and by the time we arrived we were all pretty much delirious.


.
Our hotel was literally steps from the train station (perk!). We stayed at Hotel Kreuz and Post, a historic hotel with a lot of character and charm. We stayed in the hotel’s three bedroom apartment, which was wonderful. Whenever we can swing it, I prioritize everyone’s ability to get the best sleep on a trip and this set up knocked that goal out of the park. The girls had their own room, as did David and I. There were two bathrooms, a living area, and a kitchen. It wasn’t super updated (by typical American standards), but everything felt really clean and I loved the vintage and personalized feel of the decor and art.
We checked in late afternoon, went right next door to get ski rentals (which was the most efficient ski rental process ever), then went in search of dinner. We decided on Barry’s Restaurant Bar & Lounge, since they were about to squeeze us in without a reservation. TIP ALERT: You need to book meals and experiences ahead of time in Switzerland; it’s very hard to get into most places last-minute.
We all could barely keep our eyes open, but we made it through the meal, which was very tasty in a cozy atmosphere. We headed straight back to the hotel for showers and we all crashed hard into bed.


.
Day 2: Ski Day at Kleine Scheidegg-Männlichen
12. Hours. Later. We woke up. The hotel offers a complimentary breakfast buffet with a wide variety of offerings. On ski trips, this is always a perk worth prioritizing for us. The cappuccino machine only helped solidify our affections for this hotel perk.
After breakfast we donned our ski gear, fetched our equipment from the ski storage room behind the hotel, and walked over to the train station to print off our lift tickets. We took the bus across from the hotel to the base of the mountain (terminal) then rode a gondola to the top of the mountain.
Kaitlyn had woken up with a sore throat and was hanging in there the best she could by the time we finally started skiing. I’m not sure it it was that or figuring out a ski mountain and map that runs things differently than we’re used to, but it all felt pretty clunky on that first day. There were a lot of flat runs resulting in poling, uphill areas, and confusion over how to map showed certain runs.
By midday Kaitlyn was almost in tears so I opted to take her back to the hotel. The buses were tricky to figure out but the kindness of stranger helped us board the right one and soon enough we were back at the place, her in a hot bath and me running a load of laundry in the hotel’s laundry room (perk!). David and Hailey continued skiing and had a good time, except for the part where Hailey fell of a T-bar lift and had to take off her skis and hike her way up the mountain.
It wasn’t our shiniest vacation day. That evening we were turned away from a couple of restaurants (reservations needed) but ended up having an absolutely delicious dinner at Golden India who were able to get us in a save the day!


.
Day 3: Grindelwald First & Top of Europe
The next day was forecasted to be a clear day and I knew I wanted us to have blue skies when we visited Jungfraujock, also known at the Top of Europe. We decided to start the day at Grindelwald First Top of Adventure. We walked to the gondola (free with our lift tickets) from our hotel and after a 10 minute ride arrived at an absolutely stunning view. The kids were excited and we wanted to do it all- the Cliff Walk (complimentary), the First Flyer, where you zipline over the Alps in a swing, and the First Glider, where you fly like an eagle over the Alps in a group of four, on your belly. We loved it all!
The views were stunning, there were no lines for the activities, and we were able to sip hot tea and stare at the view without a crowd. Highly recommend!
While sipping tea and admiring the clear skies we decided that it was also the right day to try and experience the Top of Europe, as clouds were supposed to roll in the next day. We took the gondola down and caught a bus to Terminal, where we rode the gondola up to the starting point of the tour, which begins with a train ride up the mountain to the highest railway station in Europe.
As part of the Top of Europe experience you get a phenomenal view of the longest glacier in the Alps… and then you get to walk through it! The ice palace was a definite highlight of our trip. We lucked out that it wasn’t crowded at all and sliding along the icy path felt truly magical. We got chocolates from the highest chocolate shop in Europe and enjoyed them on our train and gondola ride back down the mountain.
We picked up pizza from Take Away for the kids while David and I enjoyed a dinner date at the hotel’s restaurant. The atmosphere was cozy and the food was excellent. It has a menu that shifts seasonally and both of us figuratively licked our plates clean.


.
Day 4: Skiing at Grindelwald First
Kaitlyn woke up this day unsure if she was up for skiing with her sore throat. After breakfast and a promise from me that I’d happily come back with her if she tried and was miserable, we got our gear and hopped the bus back to Grindelwald First gondola to head to the top.
The day started off quite snowy, but the runs were a much better fit for us. They were wide open with a little powder and the mountain felt very open and uncrowded. We started to hit our stride and at one pausing point Kaitlyn looked and me and declared: I’m so happy I didn’t miss out on this.
We skied happily all morning, laughing when we took a lovely run down the mountain, declaring it our favorite one yet, only to have it dead end at a bus stop. There was nothing to do but pop off our skis, wait on the bus, and head back to the gondola at the base of Grindelwald First.
At the top we went in for some lunch- spaghetti Bolognese, burgers, and fries, which we enjoyed while watching some Olympics. Once fed and warm we decided to head to the highest part of the mountain and… well, my goodness it turned out to be the ultimate highlight of our skiing.
The skies were clear, the snow park was empty, the views were out of this world, and we spent the afternoon skiing that area as many times as we possibly could. We went over the hills, skied the course, and took the lift back up on repeat until finally they closed the lift for the day and we had to accept it was time to head down. That afternoon will forever be concreted in my memory.
Back at the apartment we changed and headed to dinner. We popped into a few places, none that had space for us (reservations needed), so we returned to Barry’s where we enjoyed a traditional Switzerland cheese fondue! The girls were just so-so on the Raclette cheese, but the potatoes and bread were a hit for all.
The girls got cozy back at the apartment afterwards while David and I made us of the saunas in the spa area at the hotel. As a family we sure missed the hot tub experience (it definitely is not as prevalent in Europe as in the US), but the sauna was beautiful and provided a nice warm up before calling it a night.


.
Day 5: Skiing at Kleine Scheidegg-Männlichen
Our last ski day we decided to return to Kleine Scheidegg-Männlichen via Grindelwald Terminal, taking the Eiger Express gondola up. We knew wet weather was supposed to be returning and while it was rain in the town, on the mountain it was ALL snow! It was beautiful and we enjoyed it until it really started pounding down so hard that it was hard to see.
We took the opportunity to stop at The Wall Bar on the mountain, order schnitzel, sip coffee and hot chocolate, and watch the Olympics. I also had a shot of Jägermeister, for warming up purposes of course.
Afterwards we headed back out and were thrilled at the 6+ inches of fresh powder the storm has delivered! The weather ebbed and flowed all afternoon from clear to quite snowy. The girls loved the powder. We attempted another T-bar and lost Hailey again. I jumped offf with her and we skied down under it to attempt another ride up, which was successful! Kaitlyn fell in a hill of deep powder and it took a solid 10 minutes to dig her skies out, which she laughed endlessly at. We enjoyed the day very much and closed down the mountain.
Hungry and tired we went in search for dinner that night, stumbling upon the restaurant at Hotel Spinne completely by happenstance. The views were beautiful from the dining room, the food was hearty and delicious, and it made for a wonderful last evening in Grindelwald.


.
Day 6: Zurich & The Lindt Chocolate Factory
We woke up our last morning, packed up, grabbed breakfast, and walked across the street to the train station to be ready to leave Grindelwald by on the 9:15 train. Feeling much fresher and having finally downloaded the train app, the trip back to Zurich felt much smoother than the one there. We played cards and watched the rain hit the windows, which the girls were delighted at for the very authentic Harry Potter Hogwarts train feel.
It was pouring when we got to Zurich and we walked the quarter mile to our Marriott in it. We unloaded into our room and decided on lunch at the hotel bar, which was surprisingly good. At lunch we surprised the girls with the our rainy day activity- visiting the Lindt Chocolate Factory & Museum!
They both were excited at the prospect of seeing where their favorite chocolate truffles were made, so much so that Kaitlyn burst into happy tears. After lunch we went back to the train station and a 15 minute train followed by a 15 minute walk had us arriving at the grand site of the Lindt Chocolate Factory!
Let me tell you, like dinners in Switzerland, this needs to be booked weeks in advance. We learned that the hard way when we tried to book it a few days prior and it was all sold out. We scored the very last set of tickets to a chocolate bar making class which allowed this trip to happen.
The building itself is grand! Being greeted by the world’s tallest chocolate fountain sets the tone and every experience that follows matches up. Our chocolate bar making tickets didn’t grant us entry into the museum, but we were told there were a few available last minute in person (even though online it said sold out). We decided to go for the full experience to learn the history of chocolate and revel in the unlimited chocolate tastings.
Everything is very well done, from the museum experience to our chocolate bar making class. They dressed us in chef hats and aprons, walked us through the bar making process, educated us on the differences in chocolate types, and made the whole experience deeply enjoyable for us all. Highly recommend!


.
We stayed approximately three hours at the museum, including the hour of our class, and took the train back to Zurich all hopped up on chocolate.
We went in search of dinner and a friend had told me about a place called Zeughauskeller, so we went in search of this historic and popular restaurant. We lucked out and they were able to fit us into the packed place without a reservation where we enjoyed beer, apple juice in mugs, and sausages. The vibe and food were both excellent, and we all enjoyed reading the history of this for armory built in 1487. A perfect last night!


.
Back at the hotel we rotated through showers and watching the Olympics before calling it a night. At 6:15 AM we were up and catching an Uber to the airport to started our travel back home, which included a flight to Chicago, a long layover, and our flight back to Greenville. All in all, we ended up being awake for 23 hours by the time we were stepping into showers back in our own home.
Switzerland Ski Trip Conclusion and Takeaways
- The travel was a LOT for a weeklong trip. If I were to do it again, I’d spend a day or two in Zurich before heading to Grindelwald.
- The views of the Alps are absolutely stunning and I really don’t think you can find a more breathtaking mountain range on earth. (But if you have one you think could rival it, I’m all ears).
- Get the train app. It solves all your problems.
- Book dinners and tours a few weeks in advance.
Trip Questions from Instagram
What made you want to go to Switzerland? I enjoyed seeing your pictures- beautiful there.
You hit the nail on the head- the beauty! I’ve always heard about the Swiss Alps and their beauty. Being that we love skiing, we decided to go for it. The country is so stunning in winter, I can only imagine how jaw dropping it is in summer.
What’s the cost comparison to US ski destinations (like Big Sky)?
On the whole, we found it to be less expensive to go to Switzerland than out west in the US. Flights are about even in cost. Lodging is less expensive in Switzerland. Lift tickets are significantly less expensive in Switzerland. Eating out is more expensive in Switzerland.
Please share a blog post with your full itinerary! This trip is on our radar!
Done! In a mere 2,700 words- ha! While we had some definite highlights, I’d do a few things differently. I’d get lodging as close to the Grindelwald First gondola as possible so you’d be close to our favorite mountain and only have to take the bus if heading to the other mountain. I would extend the trip to make travel easier on both sides. I’d make dinner reservations each night (even though I do think that can be hard to plan for based on how the day on the mountain goes).
Did you take all your ski equipment with you?
We packed our ski clothes, helmets, goggles, and gloves. We rented (very convenient, right next to the hotel) boots, skis, and poles.
Did you have to rent a car to get to the Lindt Chocolate Factory?
No car rental needed the whole trip! From Zurich it’s a short train ride to Kilchberg Station, then a 10-15 minute walk.
No question, but thanks for bringing us along!
My pleasure! I love getting to share travel destinations because I so enjoy seeing where and how other families travel myself!
Loved your stories; what will you remember most from the trip?
Oh, great question! My personal highlights: ziplining over the snowy alps together, the afternoon we we spent skiing the snow park on top of Grindelwald First over and over again with the insane views, walking through Europe’s longest glacier (the ice palace), and our last dinner together with good views, plates of pasta, and laughing together about the trip’s triumphs and mishaps.
What made you choose Switzerland? I do Northern Italy so I’m biased. 
We actually started off looking at both Switzerland and Italy, but prices in Italy were so much higher because of the Winter Olympics, so with the timing we needed, Switzerland won out. But I wouldn’t be against skiing Northern Italy to compare
How did you decide where to go in Switzerland? So many options!
We originally were looking at Zermatt, which had us research top family skiing destinations in Switzerland online. Grindelwald kept showing up in the top three wherever we looked and promised the stunning views of the Alps. That plus the fact we’re huge Harry Potter fans sealed the deal. David does not agree with that last statement
If you’re planning a trip and have any questions, please comment below and I’m happy to answer them. I think planning travel in Europe can feel intimidating and so I’m always happy to chat about our experiences if it’s helpful!


 How Do You Declutter Before Moving?
 Quick action: Tackle one room per weekend using the three-box approach. This moving strategy helps you organize efficiently and start fresh in your new space without unnecessary clutter weighing you down.
 Why Moving Creates a Natural Reset
 The psychology of moving:
 Start With a Clear Moving Strategy
 The foundation of effective decluttering:
 Three Categories for Every Item
 Pack these first: Important documents, daily-use items, and irreplaceable belongings.
 Apply the one-year rule: If you haven’t used it in 12 months, you won’t miss it.
 The Emotional Side of Letting Go
 Why we hold on:
 The truth about sentimental items:
 Creating Space for What Matters
 Envision your ideal space:
 Timeline tip: Six weeks gives you enough time without feeling rushed.
 The cut: Twelve months unused means it goes. No exceptions.
 Go digital: Photos and documents take zero physical space.
 Memory hack: A photo album takes less space than boxes of memorabilia.
 Commit to it: Once it’s scheduled, the decision is final.
 Double win: Less to move plus extra cash for your new place.
 Moving Forward With Intention
 Remember: Every item you don’t move is money saved, space gained, and stress reduced. Your new home deserves only the things that serve your life now, not the life you used to live.
 What Foods Lower Blood Pressure?
 Jump to Section:
 Vegetables
 Fruits
 Whole Grains
 Nuts & Seeds
 Fish
Fish Dairy
Dairy Garlic & Onions
 Dark Chocolate
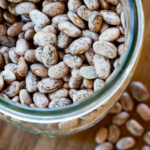
 Beans & Legumes
 Foods to Avoid
 Common Questions
 Understanding Blood Pressure Numbers
 Stage 1 Hypertension: 130-139 systolic or 80-89 diastolic
 Stage 2 Hypertension: 140/90 mmHg or higher
 Spinach
 Power stat: One cup of cooked spinach delivers 839 mg of potassium.
 Try this: Add to morning smoothies, sauté as a side dish, or use as the base for salads.
 Carrots
 Sweet Potatoes
 Berries
 Bananas
 Watermelon
 Oranges
 Kiwi
Kiwi Brown Rice
 Walnuts
 Flaxseeds
 Low-Fat Yogurt
 By the numbers: The American Heart Association recommends consuming less than 2,300 mg of sodium per day, with an ideal limit of 1,500 mg for people with high blood pressure. Most Americans consume about 3,400 mg daily, primarily from processed and restaurant foods.
 Healthy fats and oils: 2-3 servings daily
 Sweets and added sugars: 5 or fewer servings per week
 What’s On the Menu
 How It Compares
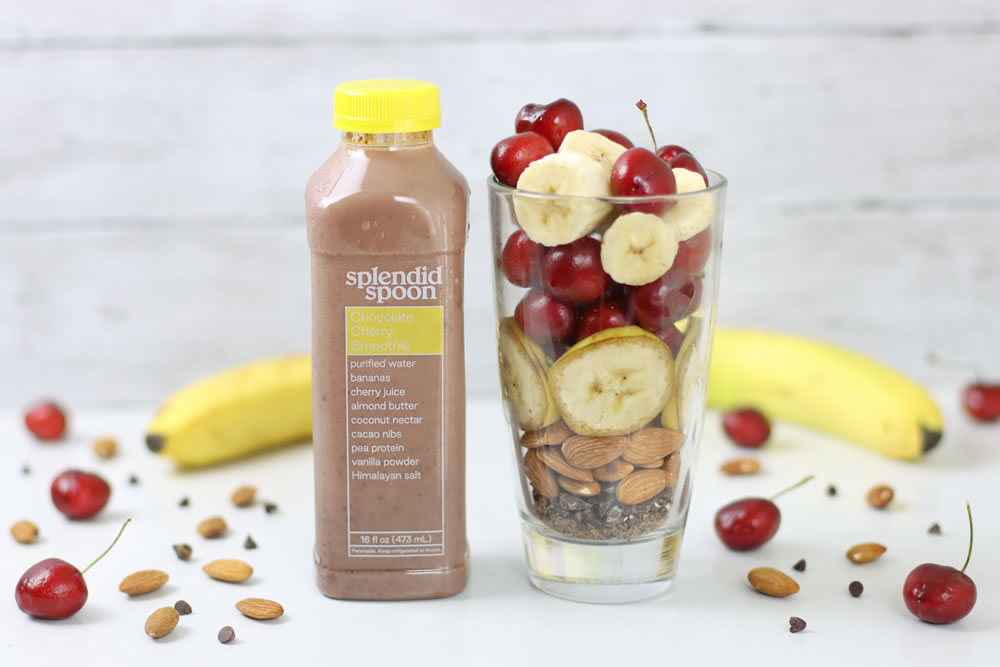

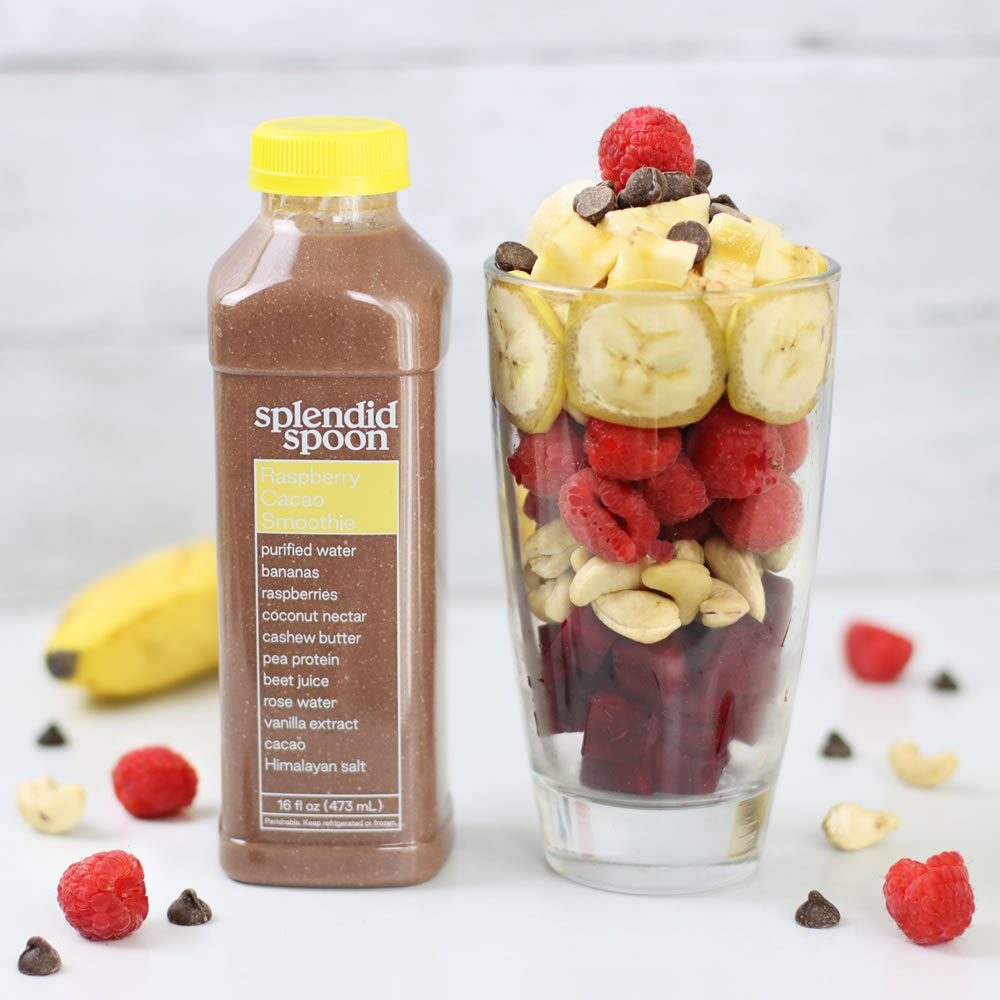
 Smoothies
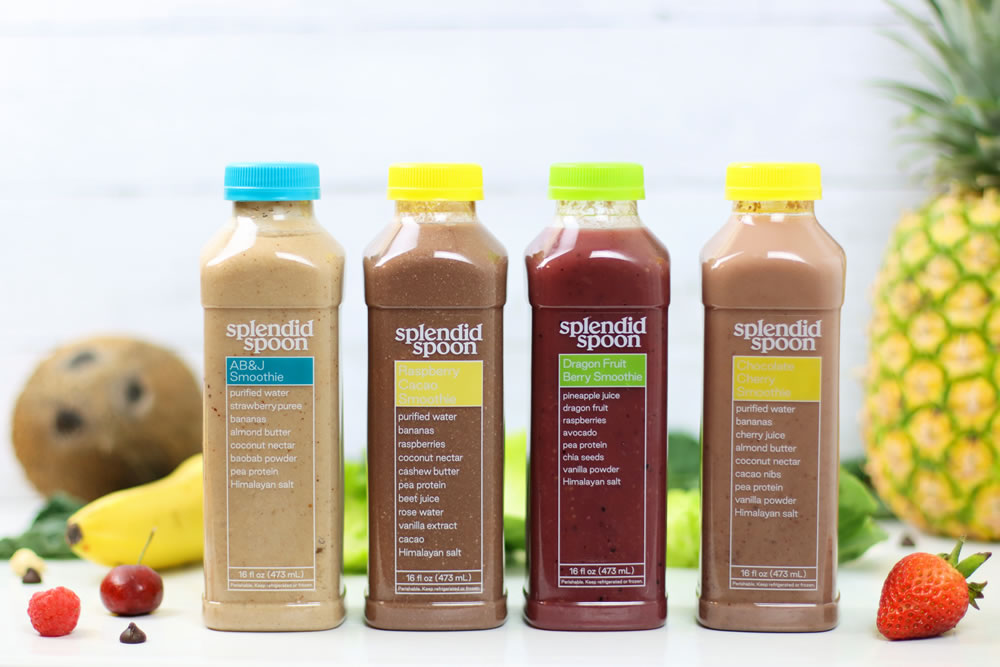
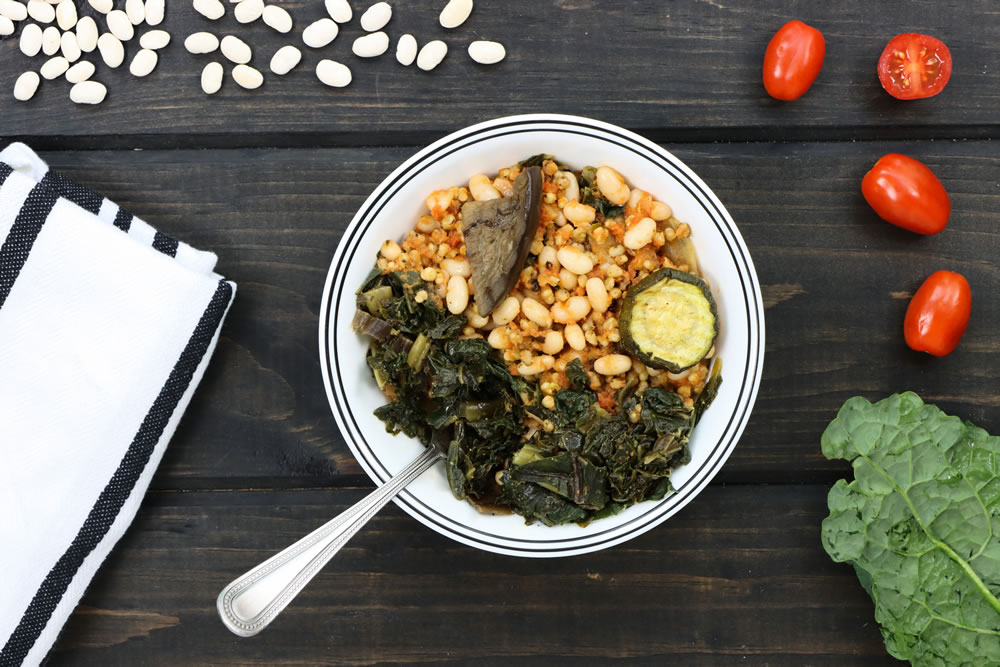
 Grain & Noodle Bowls
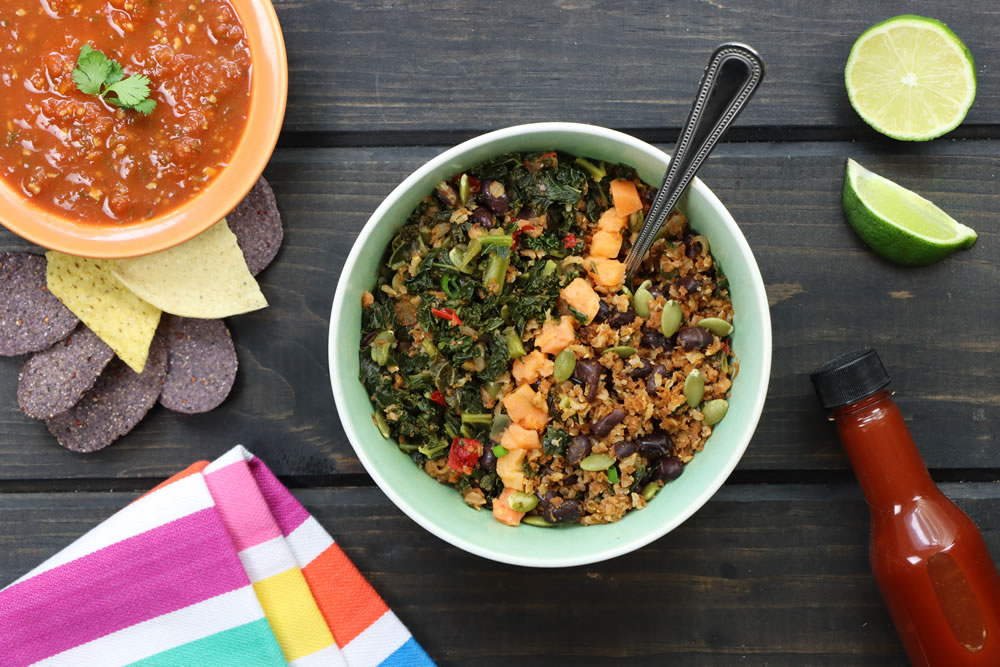

 About Serving Sizes: Each 16 oz Splendid Spoon bowl or bottle is equivalent to 1 meal or 2 snack portions. The nutrition facts on the labels are based on a snack portion (half the container).
 Real talk about the cost: Yes, Splendid Spoon is more expensive than cooking from scratch (average home-cooked meal costs about $4.23 per serving). But when you factor in grocery shopping time, food waste, cooking, and cleanup, the convenience premium starts to make sense. You’re paying for time back in your day and the certainty of eating healthy meals.
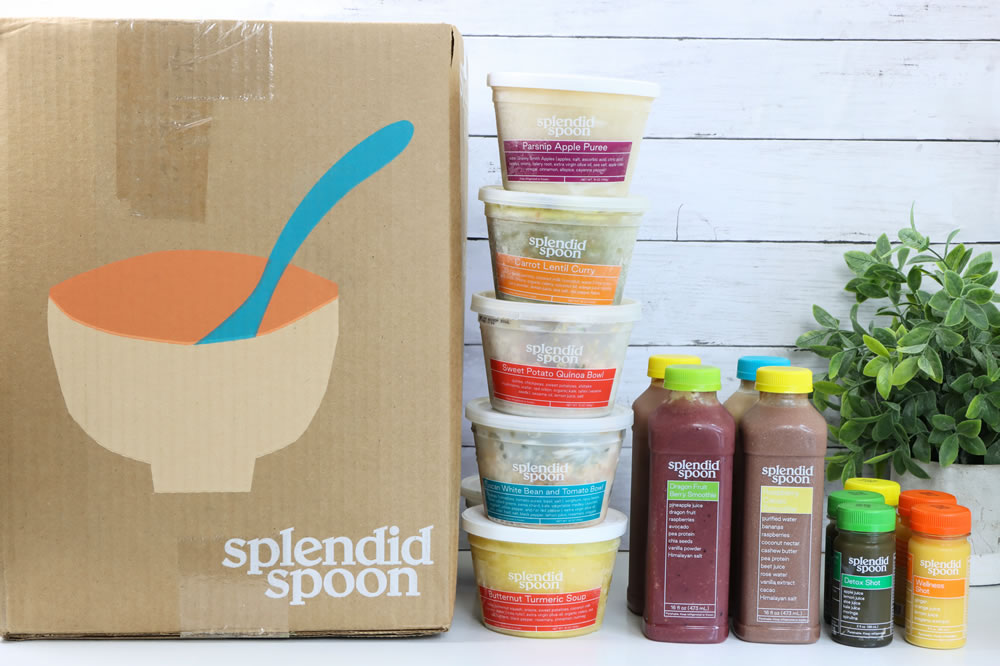
 How to Store & Reheat
 Is Splendid Spoon Sustainable?
 Packaging Details:
 Splendid Spoon might NOT work if:
 Is Splendid Spoon Good For Weight Loss?
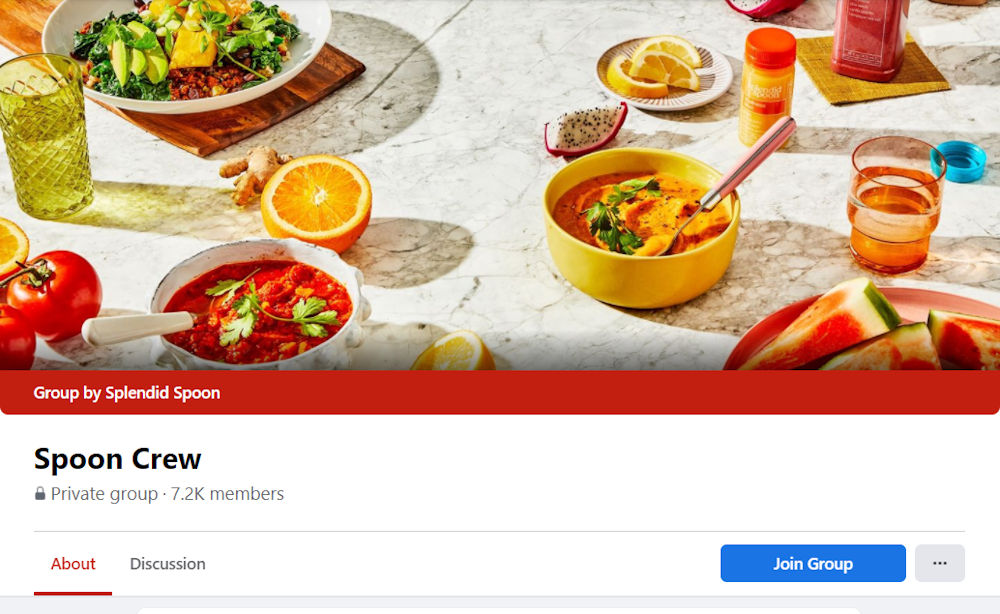
 The Spoon Crew Facebook Community
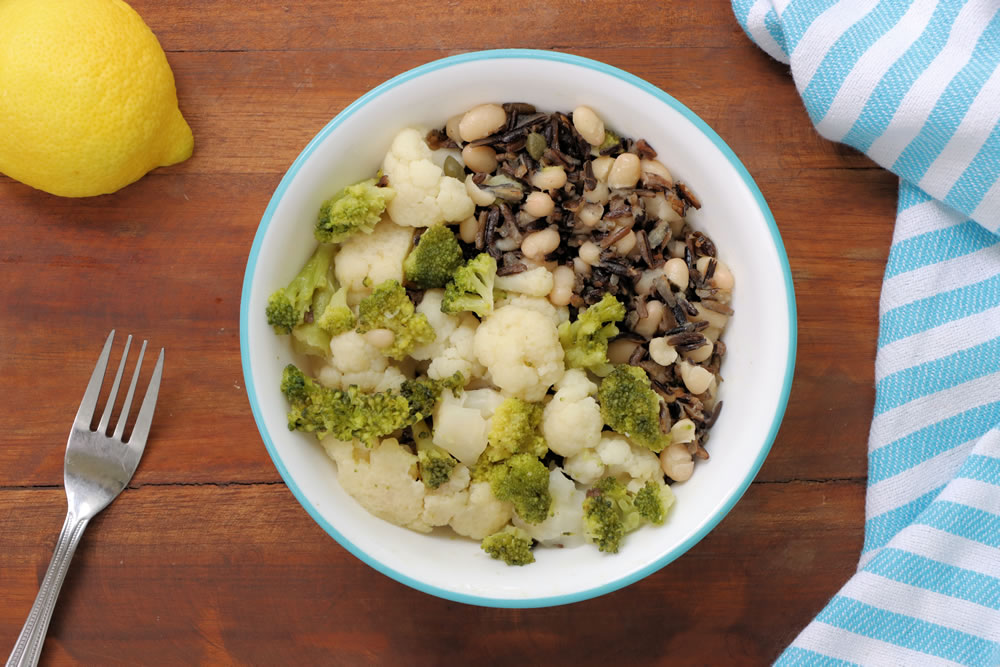
 Ready to Try Splendid Spoon?