Broccoli is a favorite to grow in most gardens. It is a favorite vegetable of many people, but it can be challenging to grow because of one little culprit; the cabbage moth. The green larvae caterpillar gets on your brassicas or broccoli, creating havoc everywhere. In this post, I will tell you how to avoid Cabbage Moths better without spraying but instead using Companion Planting methods to deter them from your plants.
What is Companion Planting?
First, we must understand what Companion Planting is before we even begin to use it.
Companion planting is the method of pairing plants that benefit one another together in a method called interplanting. The idea has existed for over 12,000 years and can also be called permaculture. It more or less uses notes from nature to plant vegetables, herbs, and flowers together to create a full ecosystem that deters and invites various bugs and pollinators in to balance things out. In contrast, Mono-culture is the opposite system, where you grow all the same things together and on their own. This method lends to a higher chance of pests and disease. Using a method like companion planting, though it isn’t perfect, can be extremely beneficial in creating a more balanced ecosystem and lowering the pressure of pests, weeds, and more to have a better chance of growing plants with ease and less intervention.
Some of the benefits of companion planting with your broccoli are exciting to most gardeners, particularly if you have grown them before and had issues at all.
Helps lower the chances of disease:
Polyculture ensures that a variety of plants co-exist, wherein a monoculture can create a perfect environment to spread disease or invite pests.
Help Deter Pests Naturally:
By using companion plants, we can use plants to attract bugs away from potentially susceptible plants. We can also deter pests to never even come near specific plants as well. This involves not spraying or using chemicals “organic” or not. Most of the time, this works or works enough to keep the damage low where the plant is not harmed and still produces without any issues.
Creates a pollinator-friendly and beautiful garden:
The visual benefits are nearly enough to make anyone want to companion plant. Bringing all these plants together creates a beautiful ecosystem in your garden where just 1 or 2 plants in a garden bed or group don’t offer as much chance for various colors and textures in a bed. Companion planting creates a natural world to benefit our visual eye and the pollinator’s interest.
You can plant more in a smaller area:
Since companion planting involves mixing many plants, you can disregard some plant spacing rules on seed packets. You still have to consider the size of the plant will be in maturity, but you can plant more plants in a bed. Meaning if a seed packet says you can plant 2 tomatoes within 24-28 inches of each other, it isn’t just referencing size but also nutrient draw on the soil. So take the size but not the spacing into consideration. Since you can plant more intensely, it naturally increases your yields.
Lower Weed Pressure: When you interplant, there is less space and sunlight for weeds to gain any ground, so your weed pressure lowers, and your plants thrive more easily.
Deter disease:
When all the same plants are planted together, it just asks for disease issues. Mixing different plants can keep the disease from spreading since some plants cannot take on the disease from others.
Best Companion Plants For Broccoli
Here are the best companion plants for to choose from:
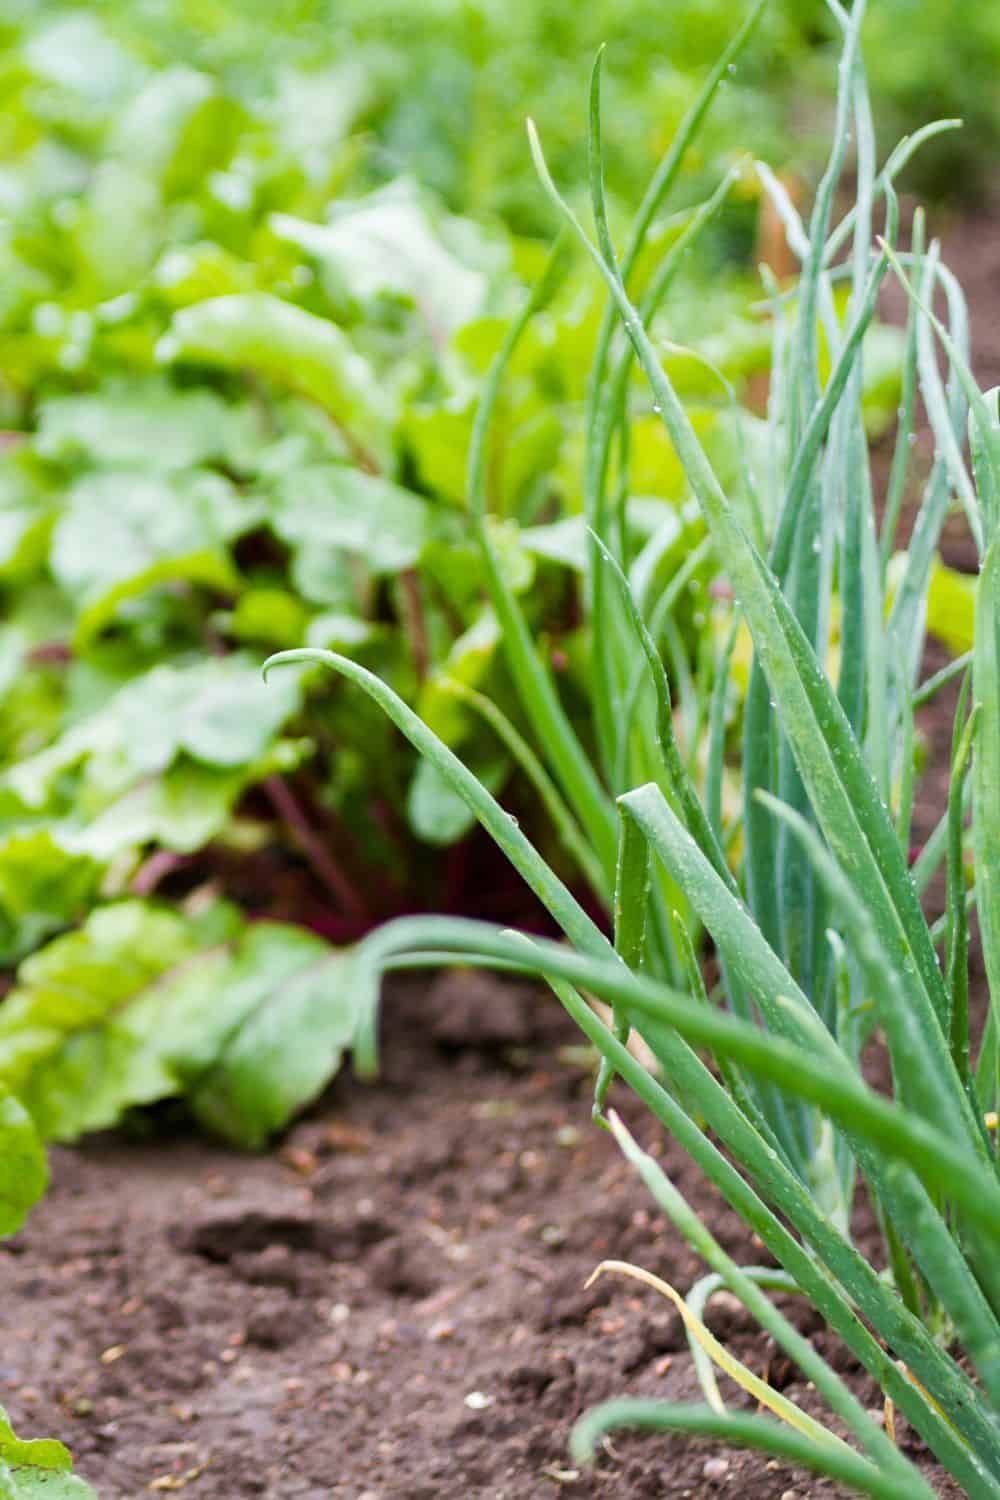
The most powerful to deter the cabbage moth:
Onions
Thyme
Dill
Oregano
Lavender
Garlic
Chives
Marigolds
Other helpful companions to bring in pollinators and will be helpful to growing successful broccoli:
Hyssop
Chamomile
Celery
Peppermint (contained in a pot)
Sage
Basil
Rosemary
Potatoes
Beets
Radishes
Carrot
Cucumber
Nasturtium
Spinach
Swiss Chard
Worst Companion Plants For Broccoli
As important as it is to understand the best plants to plant with your broccoli, it is also important to understand the worst ones too:
Do not plant these with your broccoli or rotate them one after the other:
Tomatoes
Eggplant
Lima Beans
Peppers
Squash
Pole Beans
Snap Beans
Strawberries
Crops that are heavy feeders similar to broccoli and will draw too much off the soil and hinder growth:
Watermelon or any melons
Pumpkins
Sweet Corn
Fennel
Asparagus
Understanding companion plants for Broccoli is so important. You will find that intermixing these plants in and around your broccoli will make for a happy garden bed and ecosystem that may surprise you and just be absolutely beautiful to look at.
Broccoli is a favorite to grow in most gardens. It is a favorite vegetable of many people, but it can be challenging to grow because of one little culprit; the cabbage moth. The green larvae caterpillar gets on your brassicas or broccoli, creating havoc everywhere. In this post, I will tell you how to avoid Cabbage Moths better without spraying but instead using Companion Planting methods to deter them from your plants.
What is Companion Planting?
First, we must understand what Companion Planting is before we even begin to use it.
Companion planting is the method of pairing plants that benefit one another together in a method called interplanting. The idea has existed for over 12,000 years and can also be called permaculture. It more or less uses notes from nature to plant vegetables, herbs, and flowers together to create a full ecosystem that deters and invites various bugs and pollinators in to balance things out. In contrast, Mono-culture is the opposite system, where you grow all the same things together and on their own. This method lends to a higher chance of pests and disease. Using a method like companion planting, though it isn’t perfect, can be extremely beneficial in creating a more balanced ecosystem and lowering the pressure of pests, weeds, and more to have a better chance of growing plants with ease and less intervention.
Some of the benefits of companion planting with your broccoli are exciting to most gardeners, particularly if you have grown them before and had issues at all.
Helps lower the chances of disease:
Polyculture ensures that a variety of plants co-exist, wherein a monoculture can create a perfect environment to spread disease or invite pests.
Help Deter Pests Naturally:
By using companion plants, we can use plants to attract bugs away from potentially susceptible plants. We can also deter pests to never even come near specific plants as well. This involves not spraying or using chemicals “organic” or not. Most of the time, this works or works enough to keep the damage low where the plant is not harmed and still produces without any issues.
Creates a pollinator-friendly and beautiful garden:
The visual benefits are nearly enough to make anyone want to companion plant. Bringing all these plants together creates a beautiful ecosystem in your garden where just 1 or 2 plants in a garden bed or group don’t offer as much chance for various colors and textures in a bed. Companion planting creates a natural world to benefit our visual eye and the pollinator’s interest.
You can plant more in a smaller area:
Since companion planting involves mixing many plants, you can disregard some plant spacing rules on seed packets. You still have to consider the size of the plant will be in maturity, but you can plant more plants in a bed. Meaning if a seed packet says you can plant 2 tomatoes within 24-28 inches of each other, it isn’t just referencing size but also nutrient draw on the soil. So take the size but not the spacing into consideration. Since you can plant more intensely, it naturally increases your yields.
Lower Weed Pressure: When you interplant, there is less space and sunlight for weeds to gain any ground, so your weed pressure lowers, and your plants thrive more easily.
Deter disease:
When all the same plants are planted together, it just asks for disease issues. Mixing different plants can keep the disease from spreading since some plants cannot take on the disease from others.
Best Companion Plants For Broccoli
Here are the best companion plants for to choose from:
The most powerful to deter the cabbage moth:
Onions
Thyme
Dill
Oregano
Lavender
Garlic
Chives
Marigolds
Other helpful companions to bring in pollinators and will be helpful to growing successful broccoli:
Hyssop
Chamomile
Celery
Peppermint (contained in a pot)
Sage
Basil
Rosemary
Potatoes
Beets
Radishes
Carrot
Cucumber
Nasturtium
Spinach
Swiss Chard
Worst Companion Plants For Broccoli
As important as it is to understand the best plants to plant with your broccoli, it is also important to understand the worst ones too:
Do not plant these with your broccoli or rotate them one after the other:
Tomatoes
Eggplant
Lima Beans
Peppers
Squash
Pole Beans
Snap Beans
Strawberries
Crops that are heavy feeders similar to broccoli and will draw too much off the soil and hinder growth:
Watermelon or any melons
Pumpkins
Sweet Corn
Fennel
Asparagus
Understanding companion plants for Broccoli is so important. You will find that intermixing these plants in and around your broccoli will make for a happy garden bed and ecosystem that may surprise you and just be absolutely beautiful to look at.
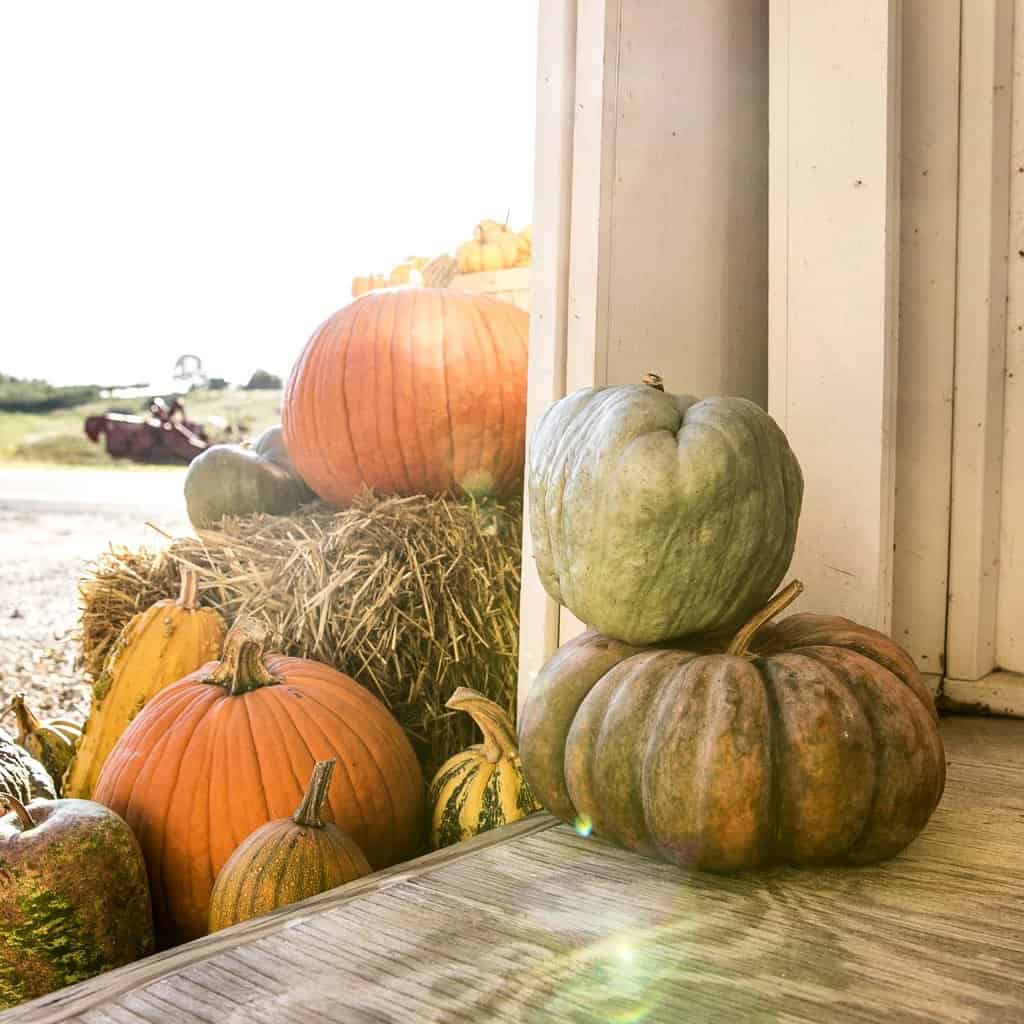
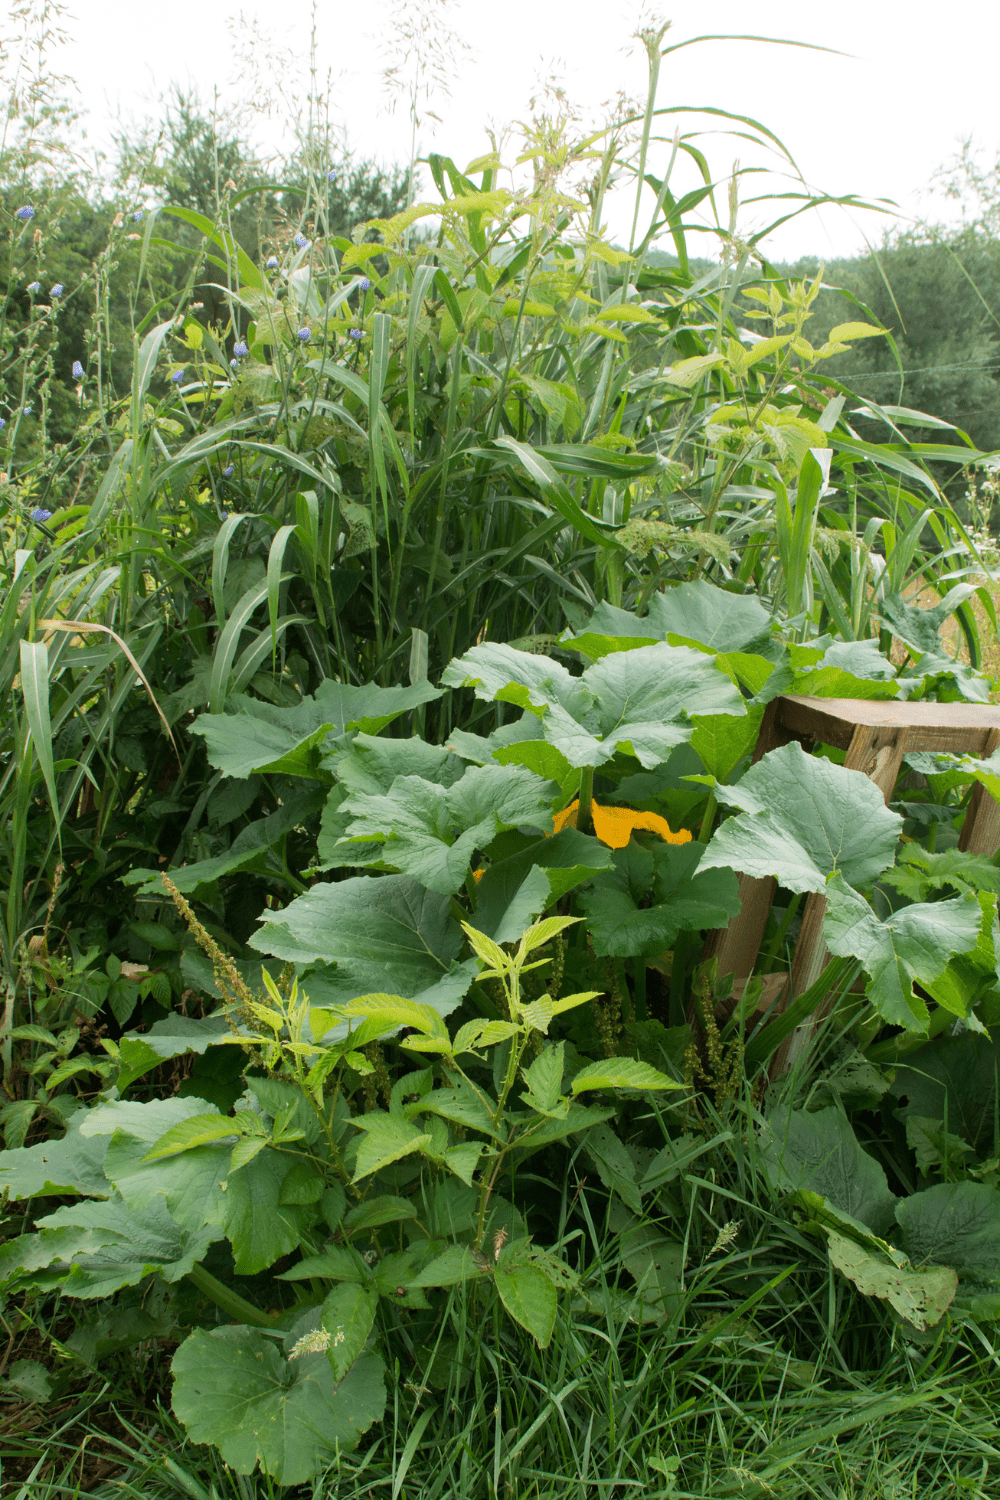
Pumpkins are one of the most prized crops in a garden. With their large size and gifts at the end of the growing season, they feel like the ultimate reward to a diligent gardener. If you are thinking of growing your own pumpkins this year, it is so important, no matter where you live to understand the timing for planting them and the best practices to consider for a successful harvest. Many would like to have pumpkins to decorate for Halloween, so understanding this timing is key! In this post, I will give you all the info you need to grow your own pumpkins, whether for your porch for decoration or for just enjoying as the weather cools down.
Types of Pumpkins
Part of knowing when to plant your pumpkins is knowing which variety you will be growing. Here is a list of the main types of pumpkins:
Jack-O-Lantern:
These are the classic varieties that are used for Halloween. Their maturity is between 90-120 days, depending on the specific variety
Sugar Pie Pumpkin:
These pumpkins are designed specifically for cooking and canning of their meat and flesh after they are baked. You can see how to save our own pumpkin in this post. It takes between 85-110 days. These are Mid to small-sized pumpkins typically.
Colored Pumpkins:
These varieties are often solely for decoration, but some varieties are not and can serve as food and decor. Check the labels of your seed packets. The maturity ranges between 90-120 days
Miniature Pumpkins:
These small pumpkins typically mature in 80-100 days’ time, which is great if you are short on time in your growing season. These are also great if you have a smaller space.
Giant Pumpkins:
These varieties are obviously very large and require a lot of time to mature. If you have a short season but want to grow them, make sure that you begin them as a start before you plant them out. Their maturity length is 120-180 days.
These are specific types of pumpkins; each one needs a different length for maturity. Narrowing in on the ones that are right for your zone, which you can learn about here in the Old Farmer’s Almanac, will help you know which type to choose so you can nail the timing for your Hardiness Zone and garden.
When to Plant Pumpkins to Harvest by Halloween
Knowing when to plant your pumpkins so you can get them in time for Halloween will come down to a simple little equation. If you know your Hardiness Zone, then you can determine the amount of time you will have to grow this crop during the warmest times of the year. It will need plenty of water as well as fertile soil. I suggest doing the following to time your pumpkins no matter where you live:
First, determine how many warm days from the last frost to the first frost you have relatively.
Then determine the variety and see how many days it needs to mature fully. If you grow a jack-o-lantern variety, you may need 90-120 days, so count back from your last frost date 120 days to be safe. Where do you land?
Knowing this date, you can then determine if you have time to direct seed or use transplanted pumpkins. Many times, transplanting will ensure you have plenty of time to get the desired harvest. Even giving you an extra 2-3 weeks jump start will ensure a great harvest.
This simple perspective can change your success with growing pumpkins in time for Halloween. It doesn’t have to be complicated. Just knowing the parameters you are working within.
Direct Seed vs. Transplants for Pumpkins
To determine if you need to direct seed or use transplants is simple, do you want a jump start on your season? Is your growing season shorter? How much space will be allowed to give to the pumpkins to let them grow the way they need to? Transplants are also a great way to miss the times of Squash Vine Borers in the garden since they have a short season for many northern growers.
What Month is Best to Plant Pumpkins?
The best time to plant pumpkins completely depends on the specific variety, your climate (hardiness zone), and length of time. Though all these factors exist, the time is usually somewhere between April and July for planting, whether you direct seed or use transplants. Typically the soil needs to have reached 60°F (15.6°C) for you to plant and have germination and not stress the plant.
When Is It Too Late to Plant Pumpkins?
After July, it is too late to plant squash and pumpkins for the most part unless you are in a warmer region over Hardiness Zone 8. In those regions, growing pumpkins later may make sense since the weather is warmer but still cool enough not to shift their flavor and production.
How Long Does It Take Pumpkins to Grow?
Depending on the variety, Pumpkins take anywhere from 80-180 days to mature fully. This means you have to know the variety and their specific maturation. Once you know this, you will know how long your pumpkin needs to grow into the fruit you desire to harvest.
How Do I Know If My Pumpkin Is Ready?
Like many squash and melons, Pumpkins can be hard to know when they are ready. These simple tricks will help you check in and determine if your fruit is ready to be brought in for enjoyment.
The stem of the pumpkin should be brown and woody. If it is still green, it isn’t ready. The vine should die back on the fruit. This is a sign it is complete.
Check the skin to see if it is firm and hard.
The pumpkin should be the desired color based on the variety you purchased to grow.
Vines from the plants should be dead and brown, and just the fruit left.
These tricks will help you determine if your pumpkins are ready to harvest for Halloween or whenever you desire to have them.
Pumpkins can be such a fun and rewarding plant to grow in the garden, but they do take some diligence to understand their timing with how long they need to mature. Typically planting them at the same time as your tomatoes will be aligned well for a successful harvest.
Happy growing!
To learn more about growing a great garden, feel free to join one of our Free Workshops or check out our Beginner Gardener Course so you can learn the basics of how to grow almost anything in your garden this year.
Check out our Podcast to learn even more about gardening as well.
A shed is a great way to bring storage, function, and interest to your yard. The idea of a shed is a fun way to create space to create outside too. They are a versatile addition to any outdoor space, providing storage, workspace, and even a place to relax and unwind. There are so many different types, designs, and features to choose from, it can be tough to know where to start. That’s why we’ve put together this list of some of the sheds that inspire us.
This post will cover different types of sheds and what we love about them. This should help you narrow in on what you are looking for. So you can design and build the right shed for yourself.
Looking for some other ideas, our Chicken Coop Buildout is a great inspiration for building out shed ideas. Though our’s is a coop, it could easily be a shed considering its size.
Key Features of a Great Shed:
Designing a good garden shed begins with some forethought. So before we get into inspiration for you, let’s nail down some key details that make a great shed.
Size: The size of your shed will depend on how you plan to use it. If you are using it to pot and store things, make sure it is at least the size you can fit inside and move around.
Material: There are many different materials to choose from when building a shed, including wood, metal, and vinyl. Each material has its own advantages and disadvantages, so consider your budget, aesthetic preferences, and climate when making your choice. You may consider using materials that are repurposed as well. Leftover construction materials can also be a great thing to use.
Roof design: To design a garden shed to look right aesthetically, the pitched roof will be key. A good pitch will ensure it has a great look and design to it. If the pitch is too flat, it won’t have the same aesthetic appeal.
Windows: Windows are such a great way to add visual interest and bring in natural light to the space.
Flooring: Make sure you choose the flooring that will be resistant to the wear and tear of a garden. You will also want it to most likely to be able to have a drain or washable flooring. This will make it easier to keep clean.
Doors: Make sure to have at least a single door, but in some cases, a double door is a great idea so you can move a wheelbarrow in or out.
Lighting and electrical: If you want electricity to run to it, you hire a professional to install fixtures and plugs.
Landscaping: To complete the look of your shed, making a landscaping plan is essential.
If you think about all these things, you will have a great shed! Now let’s check out some ideas I am loving for sheds.
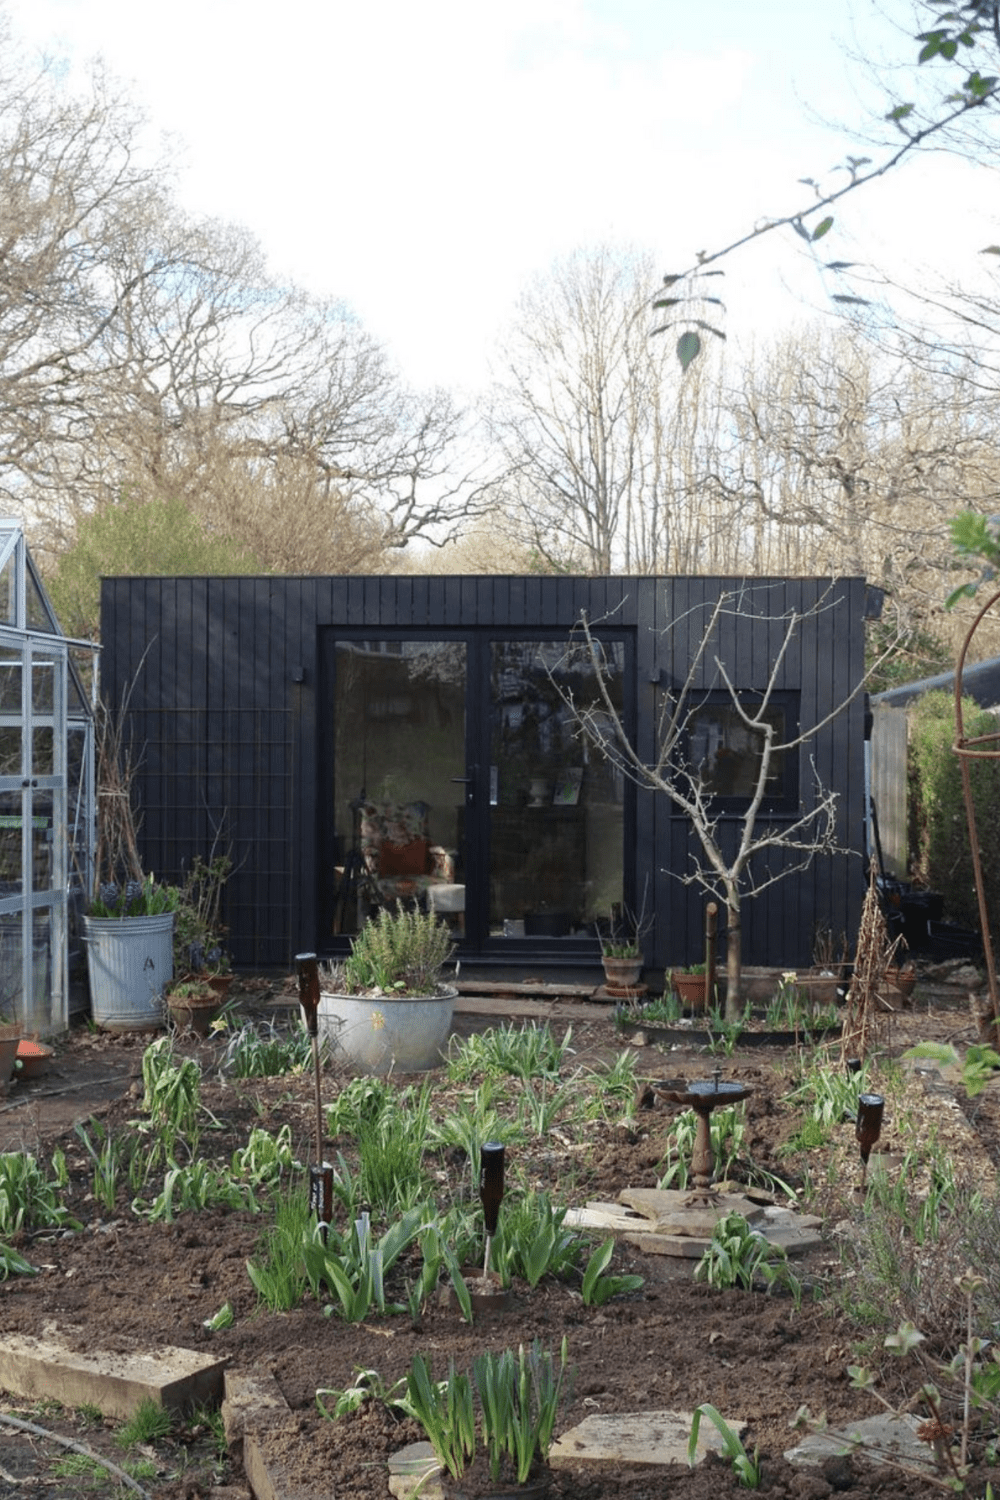
Modern Garden Shed:
Modern garden sheds are the new thing! I love this trend of adding really smart prefab buildings into our gardens. It brings architectural contrast to the wild landscape of a garden. It may be one of my favorite trends. This shed is from Victoria Sprout, who should be one of your top follows on Instagram. Her shed was built in a day. She has a whole story about it! I highly suggest checking it out.
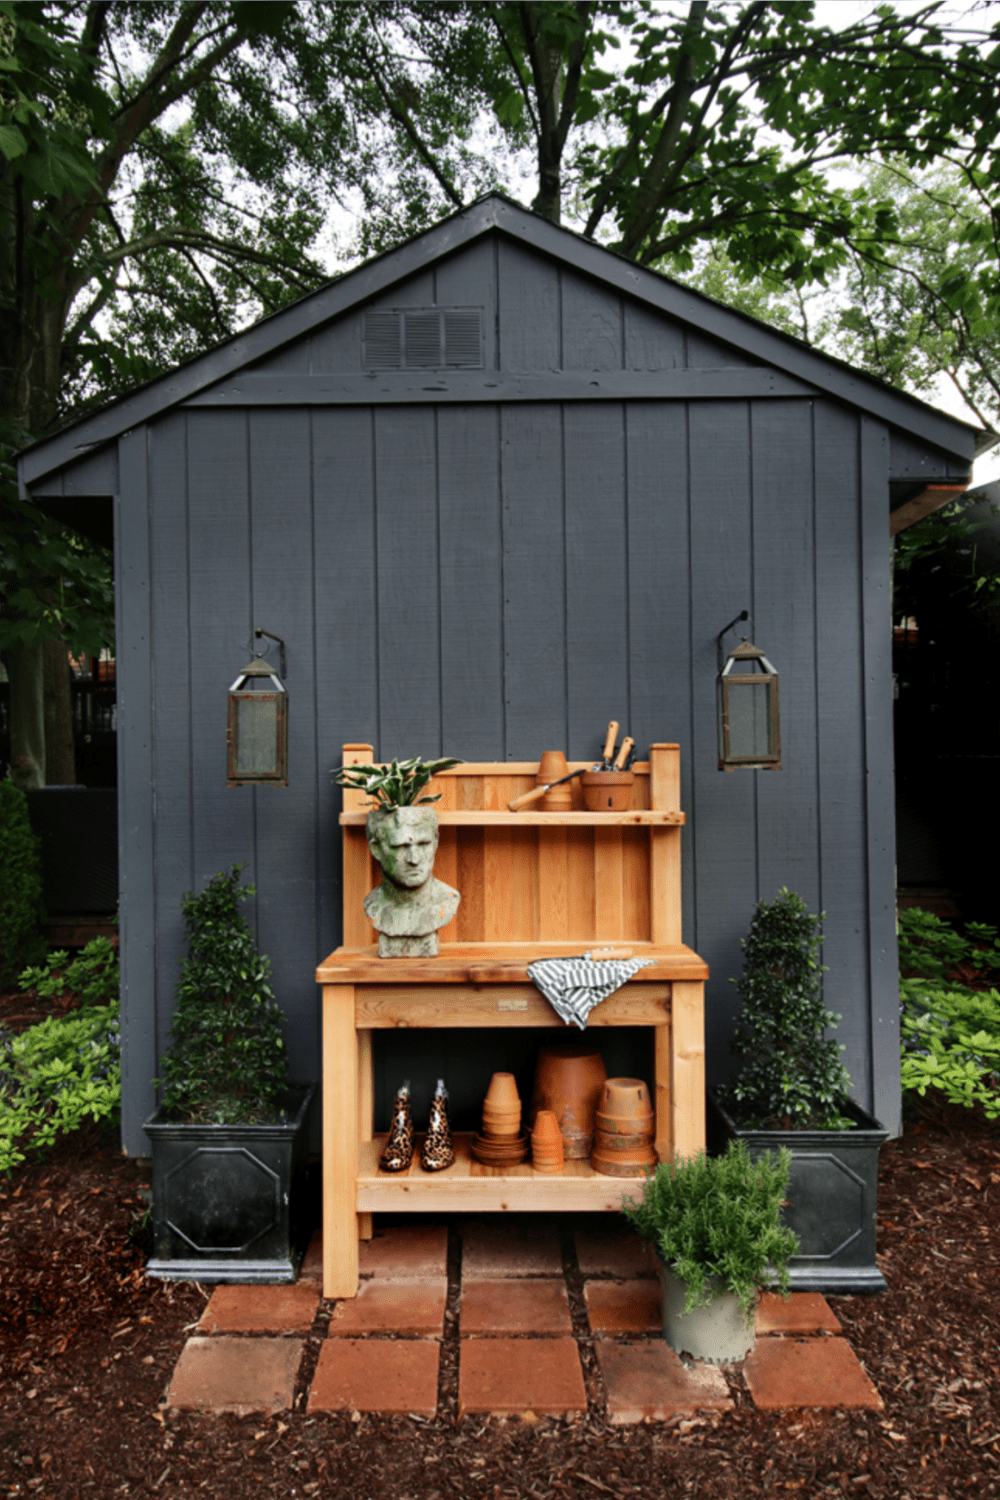
Add a Potting Bench Inside or Out:
I love thinking of a shed as a multi-sensory space. Contrasting the cedar of a potting bench with the white or black interior is so nice. I highly suggest making sure you have this sort of space in your garden shed. You can easily put it inside as well. You can see more from this feature on Hunted Interiors.
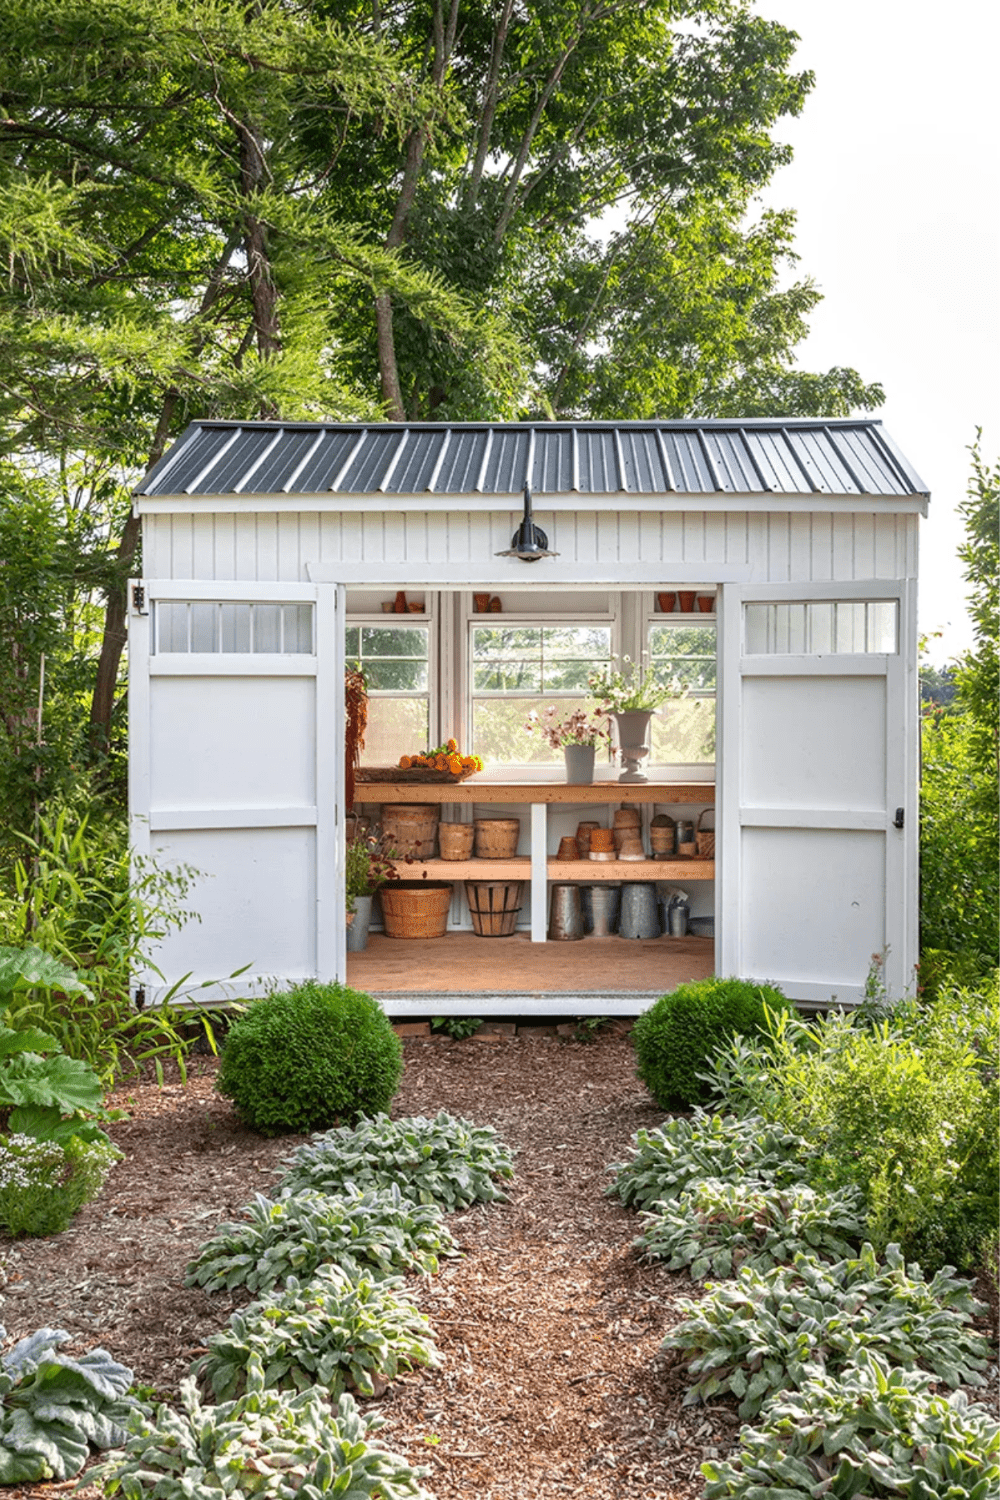
White Garden Shed:
The white garden shed concept will always be cool to me. I love how white counteracts the green. Plus, the white makes it a cooler space as well as reflects light onto all of your plants during the growing season. I love how the wood and white look together. This one was a feature in Domino Magazine of floral designer Cynthia Zamaria.
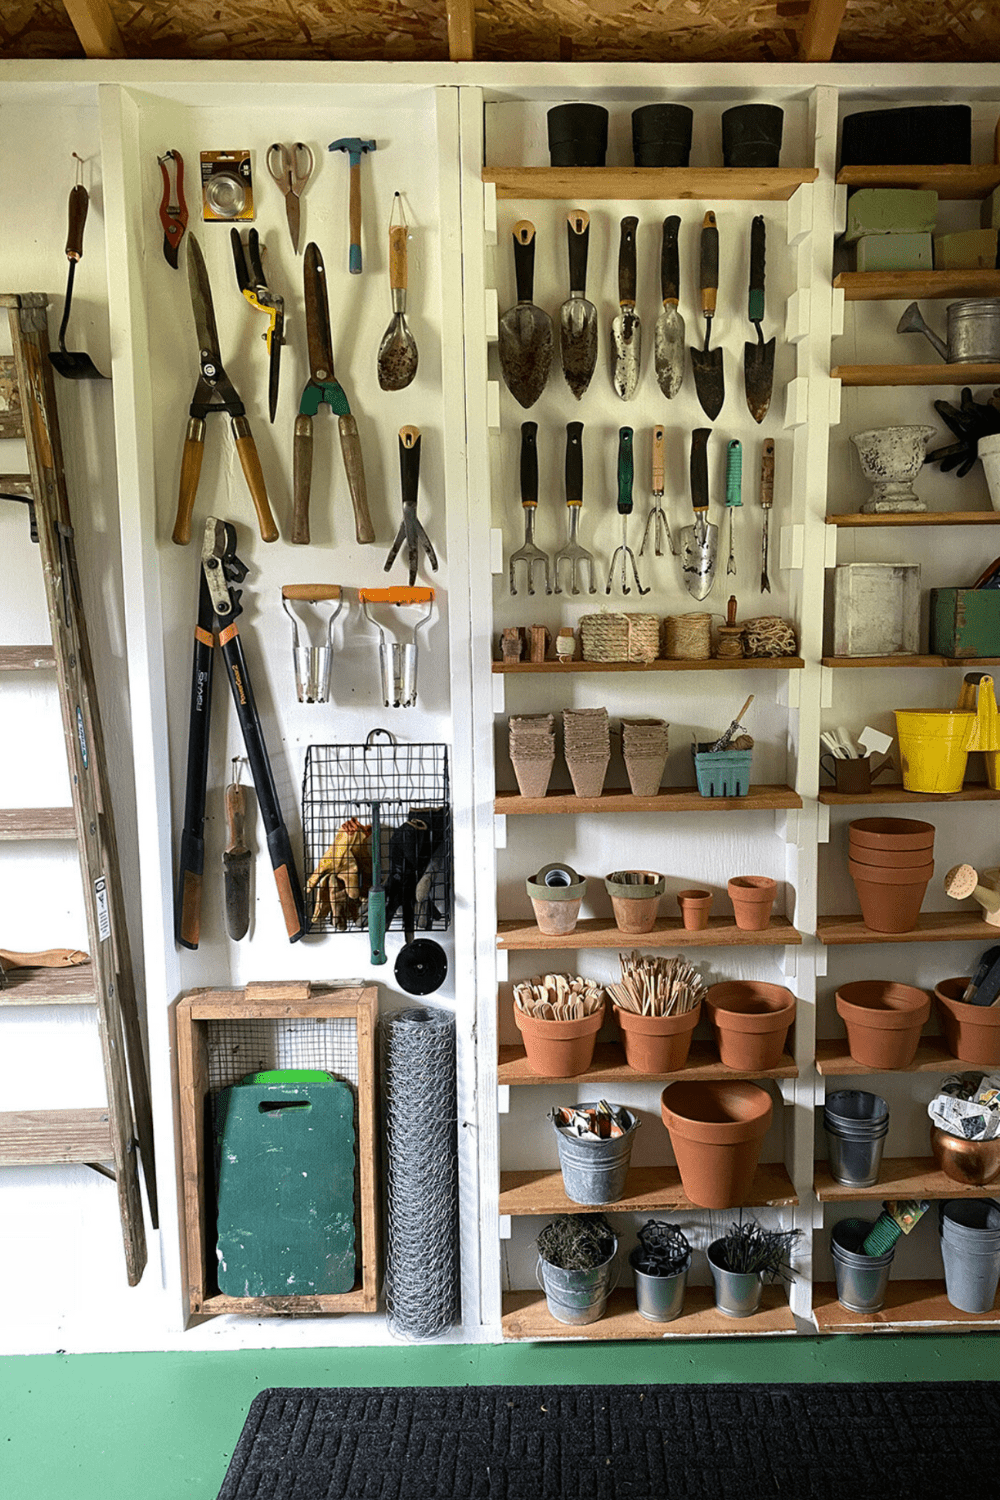
Smart Shed Organization:
Are you even making a great shed if you don’t think about the organization? Oh gosh, this is the best part. Make sure that your garden shed has a place for every single thing. It’s the best part. I think more gardens should think about this. That said, I love how terracotta pots were used in this updated shed by Made on 23rd.
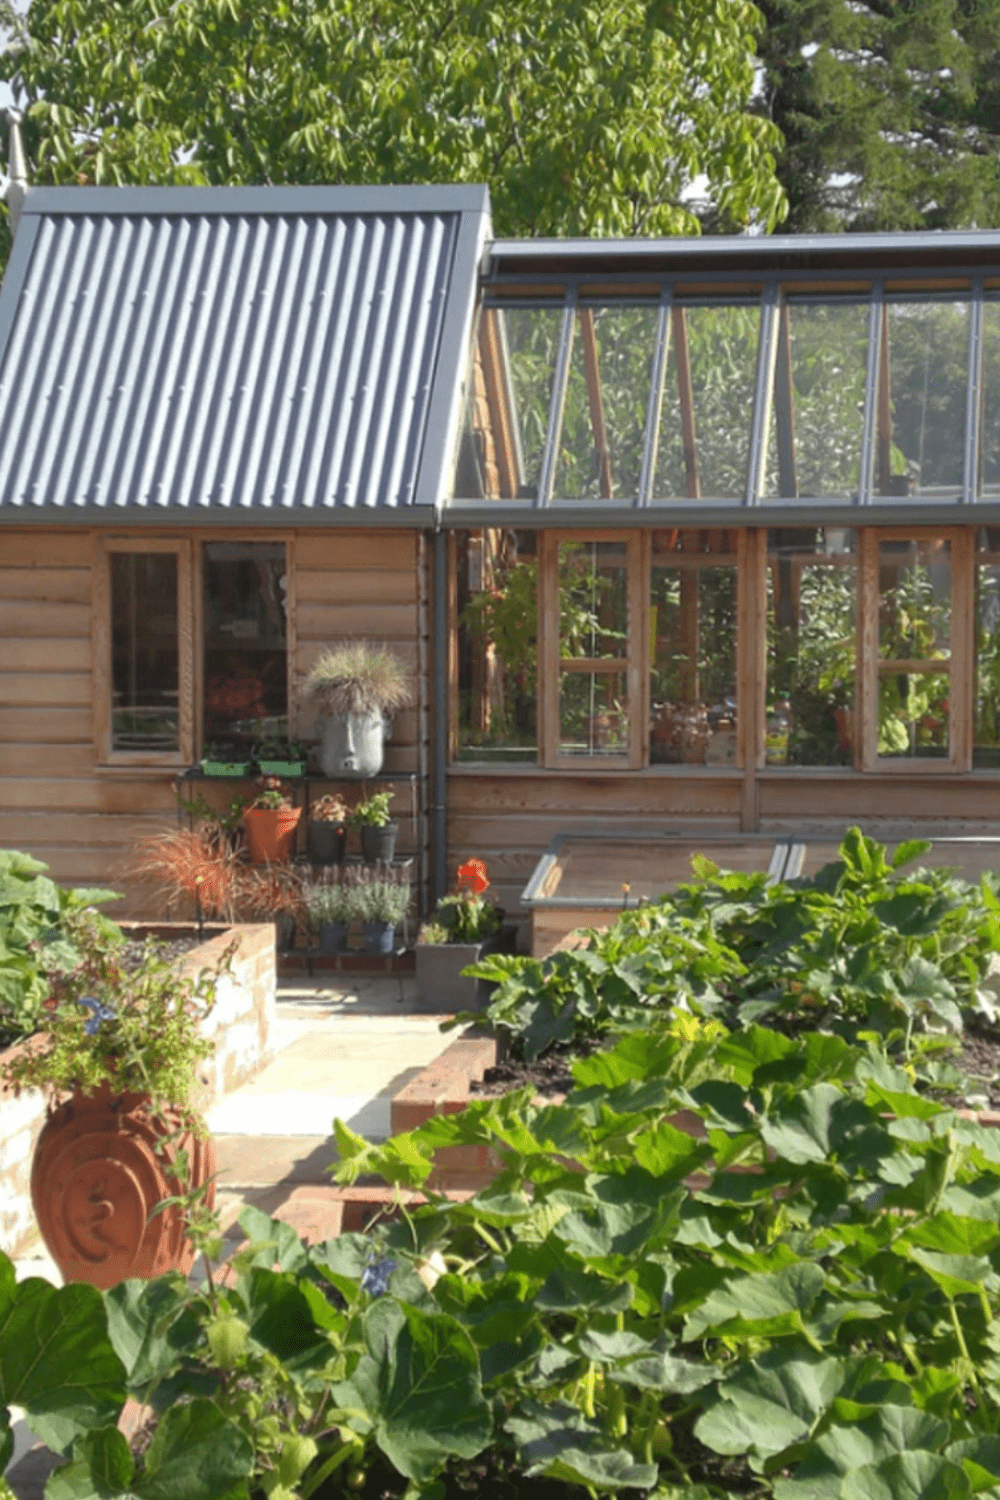
Add a Greenhouse To Your Shed:
I dream of building a garden shed with a greenhouse like this attached. One day the time and space will be right for me, but just not yet. Till then, I will swoon over these ones like this one from Greenhouse Megastore for inspiration.
Painted Garden Shed:
We see garden sheds in black, wood, or white, but what about color?! I think a great shed plays with the landscape around it. I love the idea of adding a tone of green to make it play with the growing flowers and grasses, and vegetables. I love this one from Cosy Shed Company.
All these garden shed ideas are so great to get you going in a great direction for designing and building your own shed. If you want more ideas for how we constructed our Coop, which is the size of a standard garden shed, you can head to the post about how we designed and built our shed ourselves. This post also details how to build your own DIY Garden Fence.
Whether you are a beginner gardener or an experienced gardener, sunflowers are a wonderful addition to any garden. Since they are pest-resistant heat-tolerant, and sunflowers are a favorite of gardeners everywhere. These plants are fast-growing, and these cheery flowers are a top choice for almost anyone looking to add a new flower to their garden. Here you will learn how to grow them in your garden and everything you need to know, from choosing the right variety to protecting them from pests. It’s surprisingly easy and fun to watch sunflowers blossom and bring beauty to your garden. Let’s take a look at the best methods for growing sunflowers!
Key Characteristics of Sunflowers?
Sunflowers are one flower that has some key characteristics to understand before planting in your garden. Here are things to know before you get started:
Sunflowers are Allelopathic:
This means they align in a group of plants that release specific toxins in the soil through their seeds, roots, or stems that can potentially hinder other plants’ growth. Pairing with other plants that are allelopathic will mean they both hinder each other and lead to power growth on account of both.
They are Tall!
Sunflowers can grow anywhere from 3 feet to over 10 feet tall, depending on the variety. They are the best place somewhere that you want to create a wind barrier.
Growth Habits:
These towering plants grow extremely quickly! In just a few months, they can grow dramatically fast and do all this growth in one year since they are annuals.
They follow the sun:
Sunflowers are one of many plants that are heliotropic, which means they follow the sun. It is a magical thing to watch them find the sun throughout the day. This increases their ability to grow quickly.
They grow in a variety of Growing Zones:
They can grow in zones 2 to 11. It all depends on the timing of planting to grow them in these various places.
Pollinators:
This plant feeds pollinators of all kinds, from birds to butterflies to bees. They also will bring beneficial bugs to your garden. Leaving the heads will create a natural bird feeder to enjoy at the end of the season.
Sunflowers are native to North America:
Over 4,500 years ago, Native Americans cultivated them to grow in our gardens the way we grow them now. They used the wildly growing variety to create the sunflowers we know now.
What Sunflower Variety to Choose?
There are two main varieties of sunflowers to choose from. Just like tomatoes, the plant can be divided into two groups. For sunflowers, the two areas the plants land relate to the number of times they bloom:
Branching:
This means the plants will create multiple flower heads in their growing season. They won’t be as large in many cases, but you will get continual blooms. These are my personal favorite!
Single-stem:
This variety will only create one blossom. Though many gorgeous varieties land in this category, it does mean they will only bloom once before their heads begin to sink. Typically, the bloom lasts 2-3 weeks before it begins to fade.
Beyond this, it is about looking at aesthetically beautiful ones for you. I personally love White Light, Teddy Bear, and Autumn Beauty.
How Long Do Sunflowers Take to Grow?
In most cases, it takes about 80-120 days for full maturity of your sunflowers. It is important to understand the length so you can estimate with your first and last frost when to seed your sunflowers directly in the soil.
How to Plant Sunflowers
Growing sunflowers is very easy, but there are key things you need to know so you can choose the right spot for them. Below you will find everything you need to know to plant and grow sunflowers this year:
Choose the right location:
Your sunflowers should be in a sunny spot where they get 6-10 hours of sunlight a day. The soil will need to be loose and well-draining, and fertile.
Soil Preparation:
Clear the garden area of any weeds. Add 2-3 inches of rich compost to ensure well-balanced and fertile soil. Sunflowers like a slightly acidic to neutral pH in their soil, which most gardens lean towards.
Plant Seeds:
Seeds for your sunflowers can be planted right at or after your last frost date. See your growing zone chart to get that exact info. Push the seeds 1 inch (double the size of the seed is my secret) deep into the soil and place them every 6-12 inches, depending on the variety and seed packet recommendation.
Water the seeds:
To encourage germination, water them consistently to keep the soil moist for 7-10 days till they germinate. The sunflowers will sprout in less than 2 weeks if they are watered and planted at the right time.
Protect the seedlings:
Once they sprout, they are wonderful yummy food for mice, birds, rabbits, and squirrels. So make sure you protect them with a row cover till they are about 1 foot tall if you have these pests in your garden. Once their tough stems appear, they are less likely to get eaten.
Continued Care:
Once they grow above a foot, it is about making sure, like the rest of your garden, it gets 1-1.5 inches of water a week. Other than that, you will wait for them to bloom for you.
With these simple things, you will have gorgeous and abundant sunflowers your entire summer and fall in your garden!
Pest and Disease Protection for Sunflowers
Treating the common pest and disease issues isn’t hard, but here is what to look for and how to treat them:
Choose Disease-Resistant Varieties:
Not all varieties are created equal in terms of being resistant to disease. If you have issues with downy mildew and more, then considering a more resistant variety may be a great choice.
Choose Companion Planting:
We offer an entire course on how to use companion planting in your garden, but you can place nasturtium and marigolds around your sunflowers to keep out mice, squirrels, and more. Strong-smelling plants and herbs will keep away bunnies and mice.
Practice rotation:
If you had a disease before, such as downy or powdery mildew, you will want to shift the location of your sunflowers for a year.
Water at the roots:
Watering at the roots of the plant will lower disease. Though Downy Mildew exists in the air, having damp leaves creates more potential for it to grab the broad leaves of the sunflower.
Spraying for Mildew:
I don’t suggest doing any spraying in your garden at all. But there are places you can find more natural ways of preventing it. If the mildew is present, I will observe and remove the leaves as I see them develop issues. I then dispose of them by burning them in a bon fire. The sooner they are removed, the better. Both because the plant can generate new, more productive leaves, you aren’t hurting the ecosystem or soil, and it is less likely to spread.
By following these tips, you can help prevent pests and diseases in your sunflowers and keep them healthy and beautiful all season long.
What Should I Do with Sunflowers?
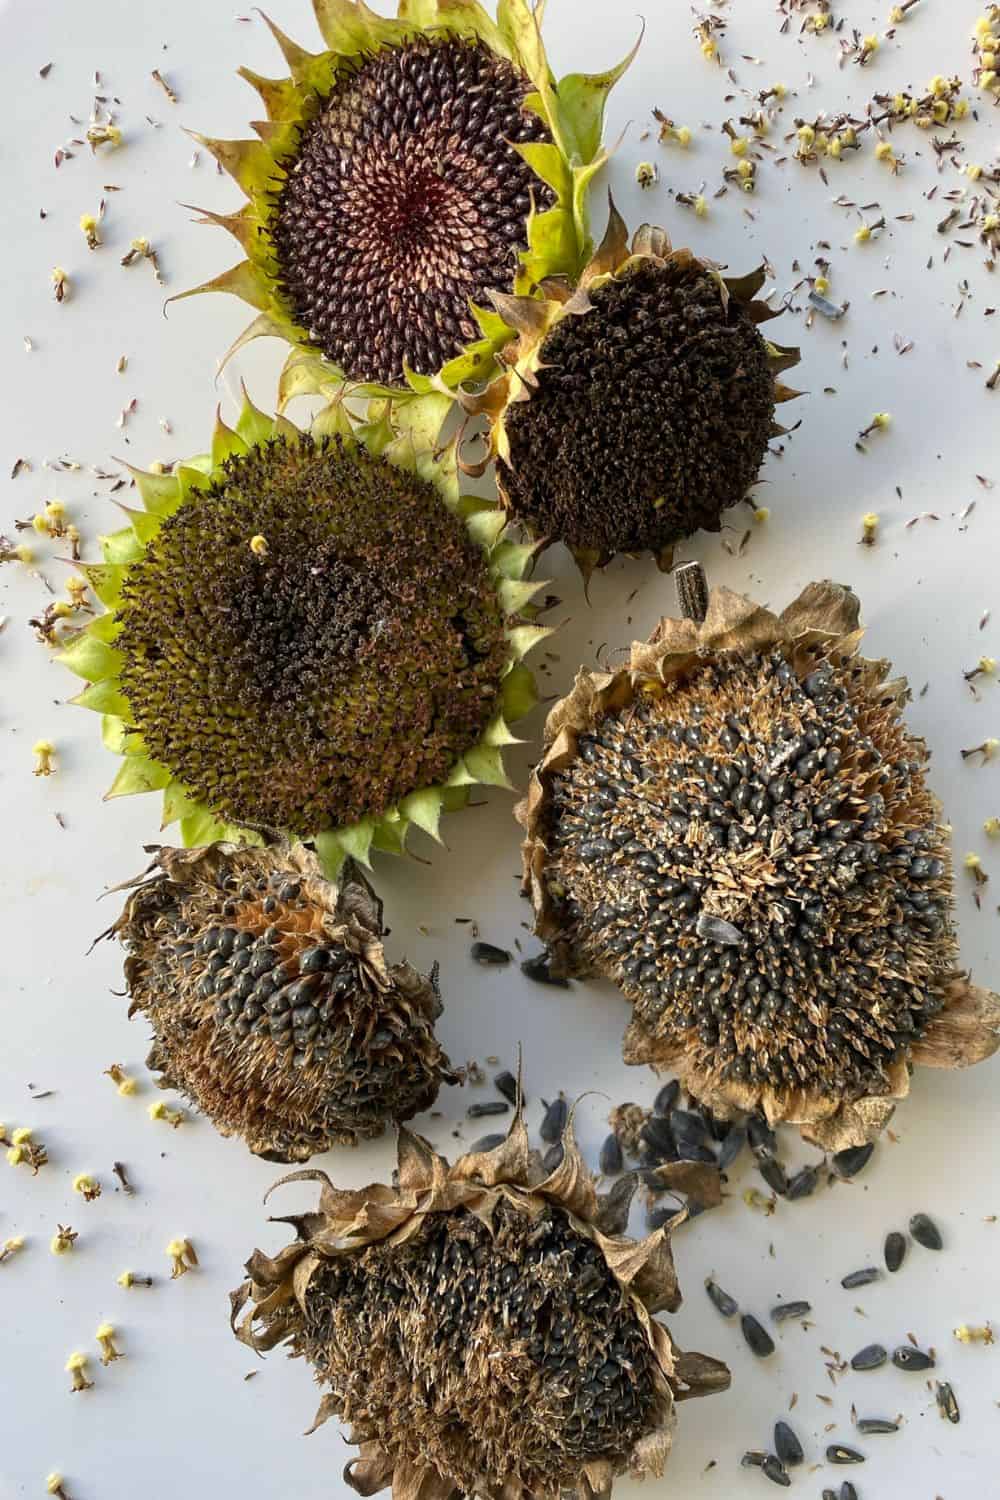
Save Seeds:
Keeping seeds whether for you to snack on or for your garden next year, is very simple. The sunflower has a cover over the seeds that will dry. Pull a few heads before they fully dry out; once the seeds are present, the birds will want them. You can cover the heads with mesh bags to present the birds, but it is just as easy to pull them to dry naturally in your greenhouse or home. Once the pollen cover parts will easily push off, the seed is underneath. You can then remove the seed and roast it or save it for growing sunflowers the next year.
Leave them for Birds:
I usually save a few seeds for us to grow sunflowers the next year. Since they are open-pollinated, it is fun to see what varieties mix together and are created, but I leave the others for the birds. The reason is sunflowers are native and feed the birds well before they migrate to warmer places or prep for winter. Feeding our birds is really important. Instead of buying processed sunflower seeds for them, I let them enjoy our sunflowers that grew without pesticides or anything harmful to them. They typically spread seeds on the ground that sprouts into new plants the next year, meaning less work for me.
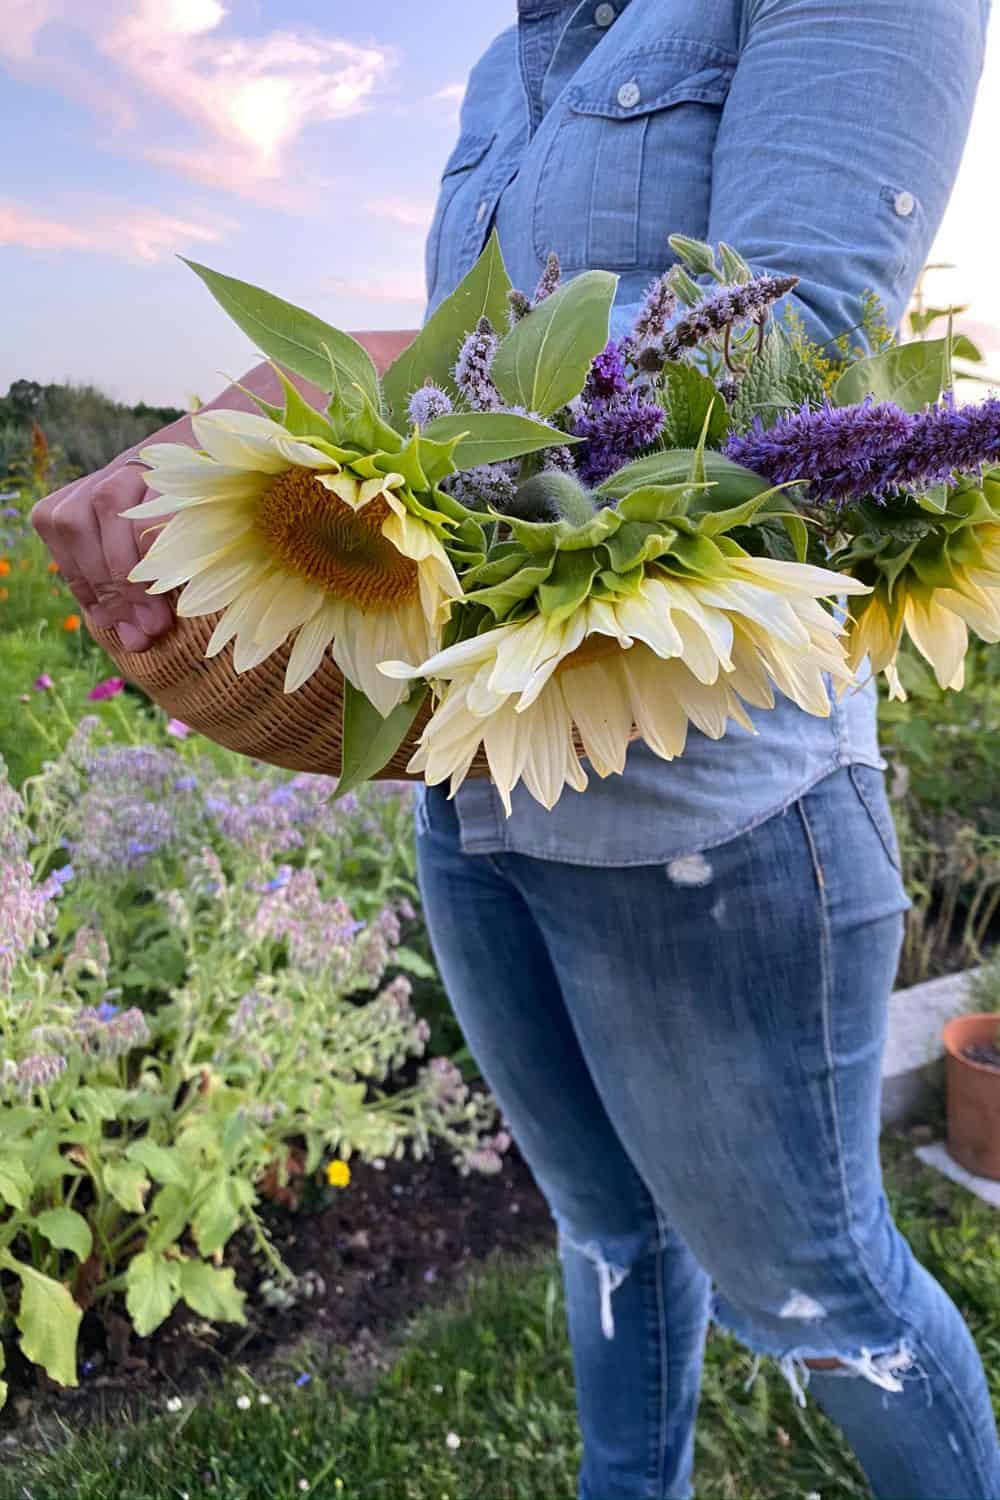
Cut Bouquets:
It is so fun to cut our branching variety to add to our bouquets every summer. They don’t make very good dried flowers and can be heavy on pollen deposits, but they sure are beautiful!
Growing sunflowers is a rewarding experience; with the right know-how, your garden can burst with color! Follow these methods to get the best sunflowers and watch your garden transform.
Learn more about how to grow a garden this year through our Beginner Gardener Course and become part of an avid group of gardeners.
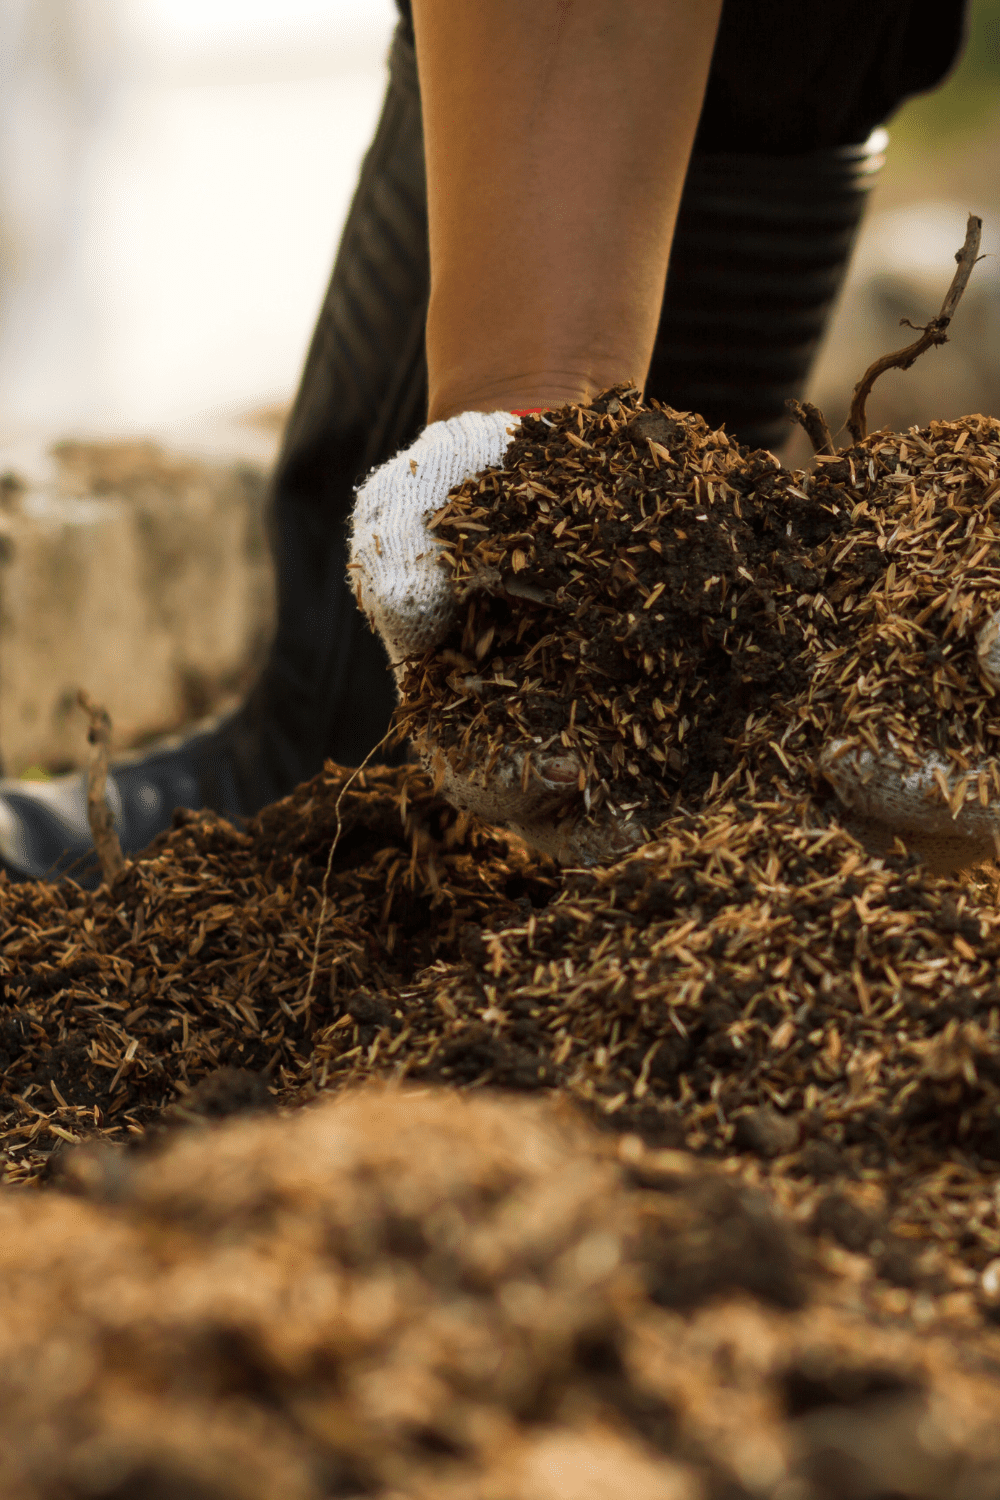
Have you ever seen small little grains of what looks like white styrofoam in your soil mix? It may look like something you don’t want in your garden, but it is actually perlite. Perlite is a type of volcanic glass that is commonly used as a soil amendment in gardening. It is formed from obsidian, a volcanic rock that is heated to high temperatures to create small, lightweight, and porous particles. Since the white rocks, which come in various grain levels, are amorous, they retain moisture well in soil mixes. Since perlite is sterile, it doesn’t add any unwanted things to your soil.
In this post, we will explain what perlite is and how to use it in your garden. We will also talk about whether perlite is a sustainable amendment in our garden and other alternatives.
What is perlite?
Perlite is naturally occurring amorphous volcanic glass with a relatively high water content, typically formed by obsidian hydration. It has the ability to expand and absorb water easily to help create aeration and space in the soil and retain water for plants. Perlite is sterile and pH-neutral, which makes it a safe and effective soil additive for promoting healthy plant growth. We use it in our garden in our raised beds to aerate the soil for effective root development and to help lower the amount of water needed since we have sandy topsoil under our raised beds.
Why use perlite in your garden?
Many gardeners love using perlite in their gardens because it lowers the amount of water that is needed in their gardens. They will use it to retain moisture naturally. This is particularly helpful for sandy soils that struggle to retain water. Mixing it into well-draining soils can be helpful when growing your vegetable garden in beds that are located in the ground. If you have more compact and clay soil that struggle with drainage, adding perlite into your compost and sand mixture could also aid in more consistent drainage in your soil.
How to use perlite in your garden?
Perlite can be used in several ways in the garden to improve soil quality and promote healthy plant growth. Here are some ways you can use perlite in your garden:
Mix perlite into the soil: Perlite can be added to the soil to create better structure, drainage, and aeration. Mix in 10-20% perlite with soil to create a lightweight and well-draining soil mixture for almost any plant.
Create a perlite layer for drainage: A layer of perlite at the bottom of plant pots or garden beds can improve drainage and prevent waterlogged soil, which can lead to root rot. Though you can also use rocks, if you have any leftover perlite, this is another great use. Add a layer of perlite at the bottom of the pot to give space for the water to drain properly.
Use perlite as a growing medium: Because perlite is a lightweight, pH-neutral substrate that can support plant growth without the need for soil, it can be a great way to grow plants in a soil-less way. This is best for cactuses and plants that don’t need nutrients.
Start seedlings in perlite: Since perlite is sterile, it is a great place to germinate your seedlings before transferring them to a large pot with soil. Just wet the medium before planting seeds.
Remember, since perlite is dusty and has fine granules, it’s important to wear gloves and a mask to avoid inhaling any fine particles. The dust can cause irritation to the skin and respiratory system if not handled carefully.
Is perlite a sustainable material?
As with anything we use in the garden, this question is important. What’s the point of growing something if it isn’t being done with the environment in mind?
Perlite’s sustainability isn’t a clear answer. Since perlite is non-renewable, meaning it doesn’t easily renew itself, but at this time, we have mined far less than what is left, there is a finite usage to it, which is important to understand. The process of mining doesn’t involve any chemicals, but it is mined and heated for it to pop into the soil with the water. The important thing is that perlite doesn’t degrade, so its need in our garden isn’t something to use year after year. Though the impact is low compared to other soil amendments, it is still important to understand that impact does exist.
What are alternatives to perlite?
Several options can offer similar benefits if you’re looking for alternatives to perlite as a soil amendment or growing medium. Here are some of the most commonly used alternatives to perlite:
Vermiculite: Like perlite, vermiculite is a lightweight and porous material that improves soil drainage and aeration. It is made from mica minerals that are heated to high temperatures, causing them to expand and become lightweight. Vermiculite is also pH-neutral and sterile, making it a safe and effective soil amendment. Though it has the same sustainability as perlite would because it is similar in methods for extraction and sourcing.
Coconut coir: Coconut coir is a byproduct of coconut processing that is becoming increasingly popular as a soil amendment. It is lightweight, pH-neutral, and has good water retention and drainage properties. Coconut coir is also a sustainable alternative to peat moss, which is often used as a soil amendment but is not environmentally friendly due to peat bogs being destroyed.
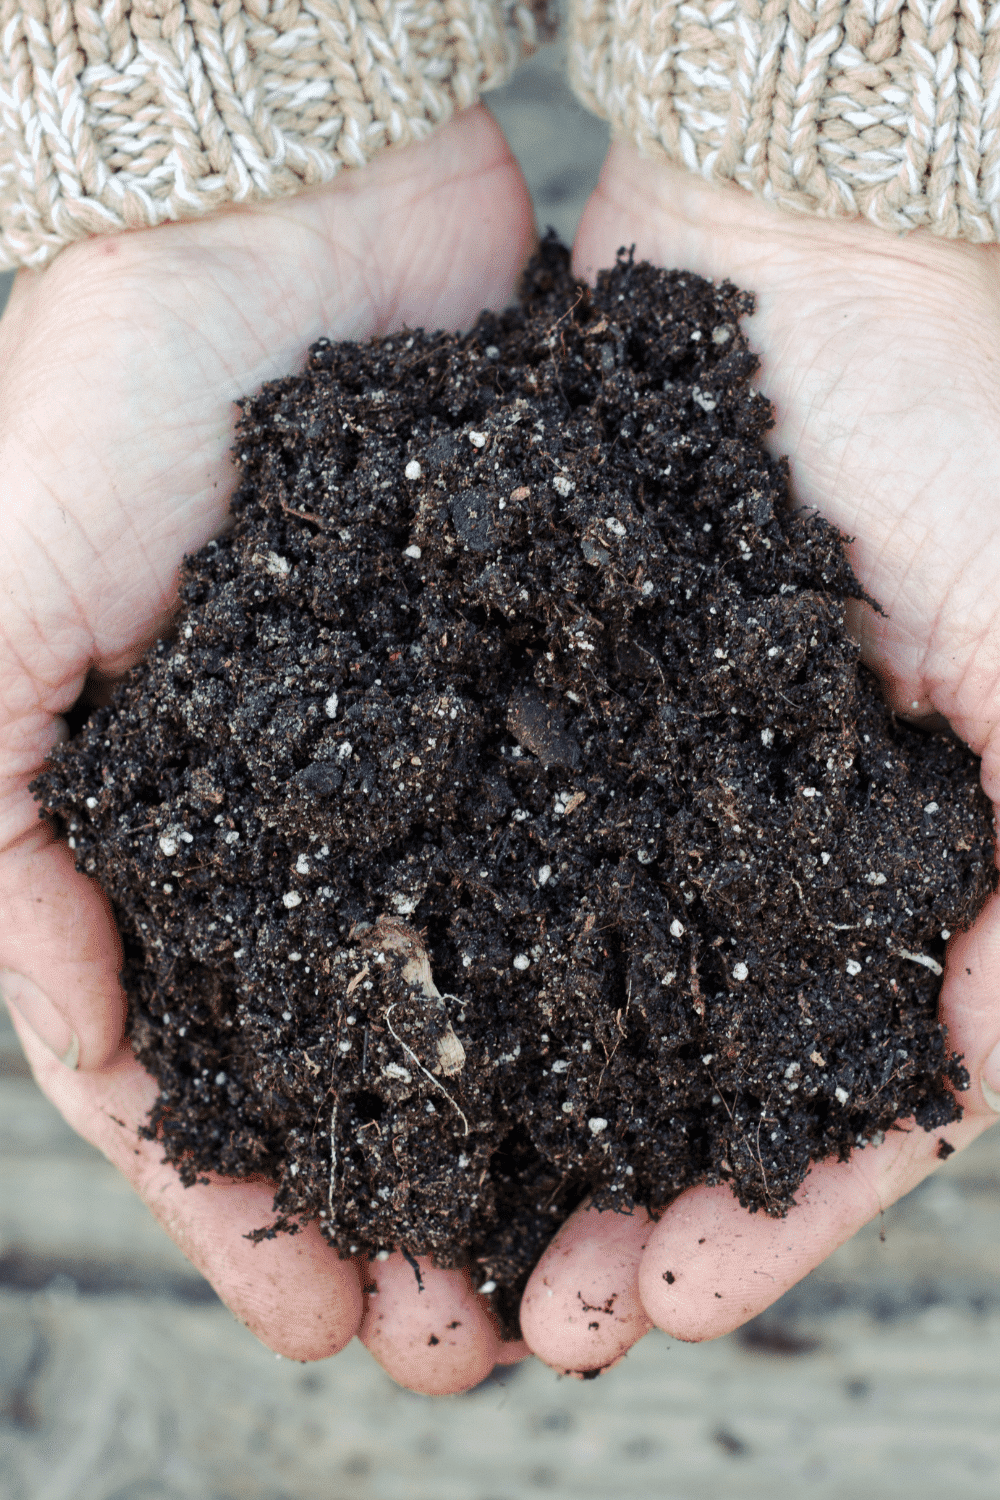
Compost: Compost is a nutrient-rich material that is made from decomposed organic matter such as leaves, grass clippings, and food scraps. It can be added to soil to improve its structure, fertility, and water retention. Compost also provides a range of beneficial microorganisms that can help promote healthy plant growth.
Rice hulls: Rice hulls are the outer covering of rice grains and are a byproduct of rice processing. They are lightweight, porous, and pH-neutral, making them a good alternative to perlite. Rice hulls also have good water retention properties and break down slowly in the soil, providing long-term benefits to plant growth.
Sand: Sand can be used to improve soil drainage and aeration, especially in heavy clay soils. It is an inexpensive and widely available alternative to perlite, but it does not offer the same level of porosity as perlite or other lightweight materials.
Overall, there are many alternatives to perlite that can offer similar benefits depending on the specific needs of your garden. It’s always a good idea to research the properties of different materials and choose the one that best suits your growing conditions and preferences.
In conclusion, perlite is a great material to use in your garden if you consistently struggle to retain moisture in your beds. For gardeners with clay soils, it can be helpful to open and aerate the soil to allow for drainage to happen more effectively. Perlite is a sustainable product because of how it is harvested, and we do not need to replace it very often. Though there are alternatives, it may not be necessary to consider them if you aren’t adding them very often to your garden to retain moisture.
To learn more about soil and gardening, join our community and check out our Beginner Gardener Course.
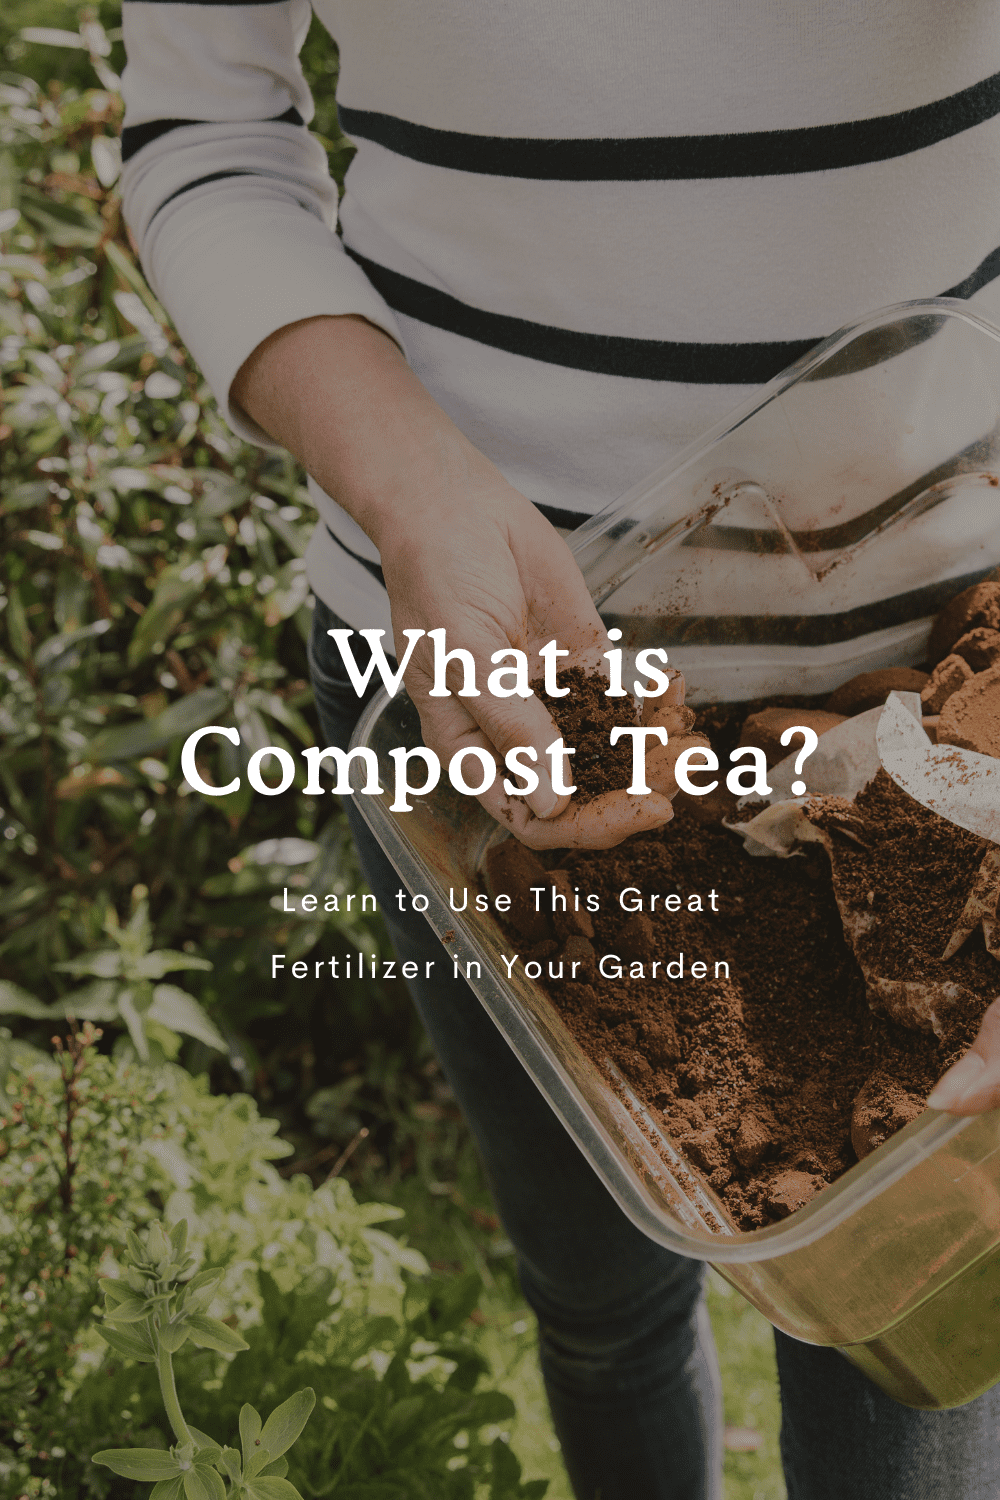
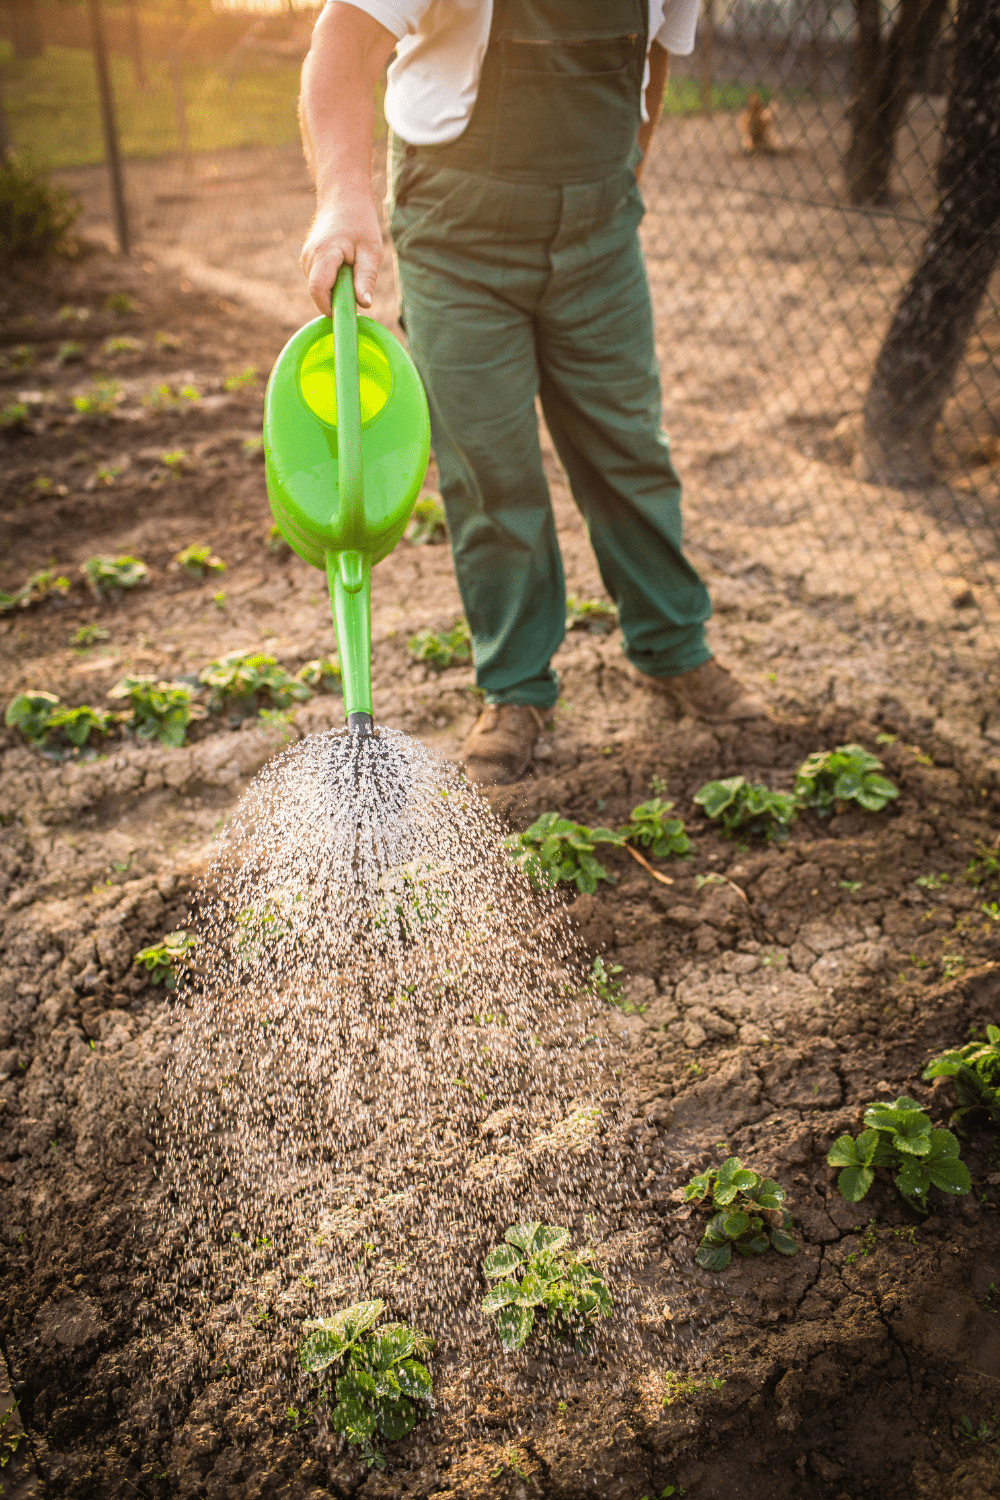
Understanding how to fertilize your garden in an environmentally friendly way can be challenging. Many fertilizers we use, even if organic, use bioproducts from slaughterhouses and poor practices in environmental sustainability. Learning to make and use compost tea ensures your garden is fed in a way that is healthy for you, the planet, and your plants without using bioproducts of animal processing.
I love using compost tea in our garden because it is a natural, nutrient-rich fertilizer that can help improve soil health and promote healthy plant growth in gardens and farms. Since compost tea is made from composted plant matter and manure from cows, goats, chickens, alpacas, or worm castings. Many home gardeners love it because not only is it an organic fertilizer that naturally occurs, but it also can easily be made at home so you know what you are putting into your soil and on your plants. The best part is that it contains many beneficial microorganisms that can help suppress harmful pathogens and pests, reduce the risk of plant diseases, and improve soil structure.
In this blog post, we’ll discuss what compost tea is, the benefits of compost tea, provide a recipe for making your own at home, and how often to apply it to your garden to build strong nutrients in your garden.
What is compost tea?
It is a popular organic fertilizer that has gained popularity among gardeners and farmers alike. Made by steeping compost in water, compost tea is a nutrient-rich liquid that can be used to nourish plants and improve soil health. It isn’t hard to make, and you can make it with many different naturally occurring materials depending on the nutrients you wish to add to your garden. More or less, it is a soluble version of composted or compostable materials.
Compost tea is made from a variety of natural materials that are high in nutrients and beneficial microorganisms. These are important in feeding your plants and maintaining healthy soil for your garden.
Here are some of the most common ingredients used to make compost tea:
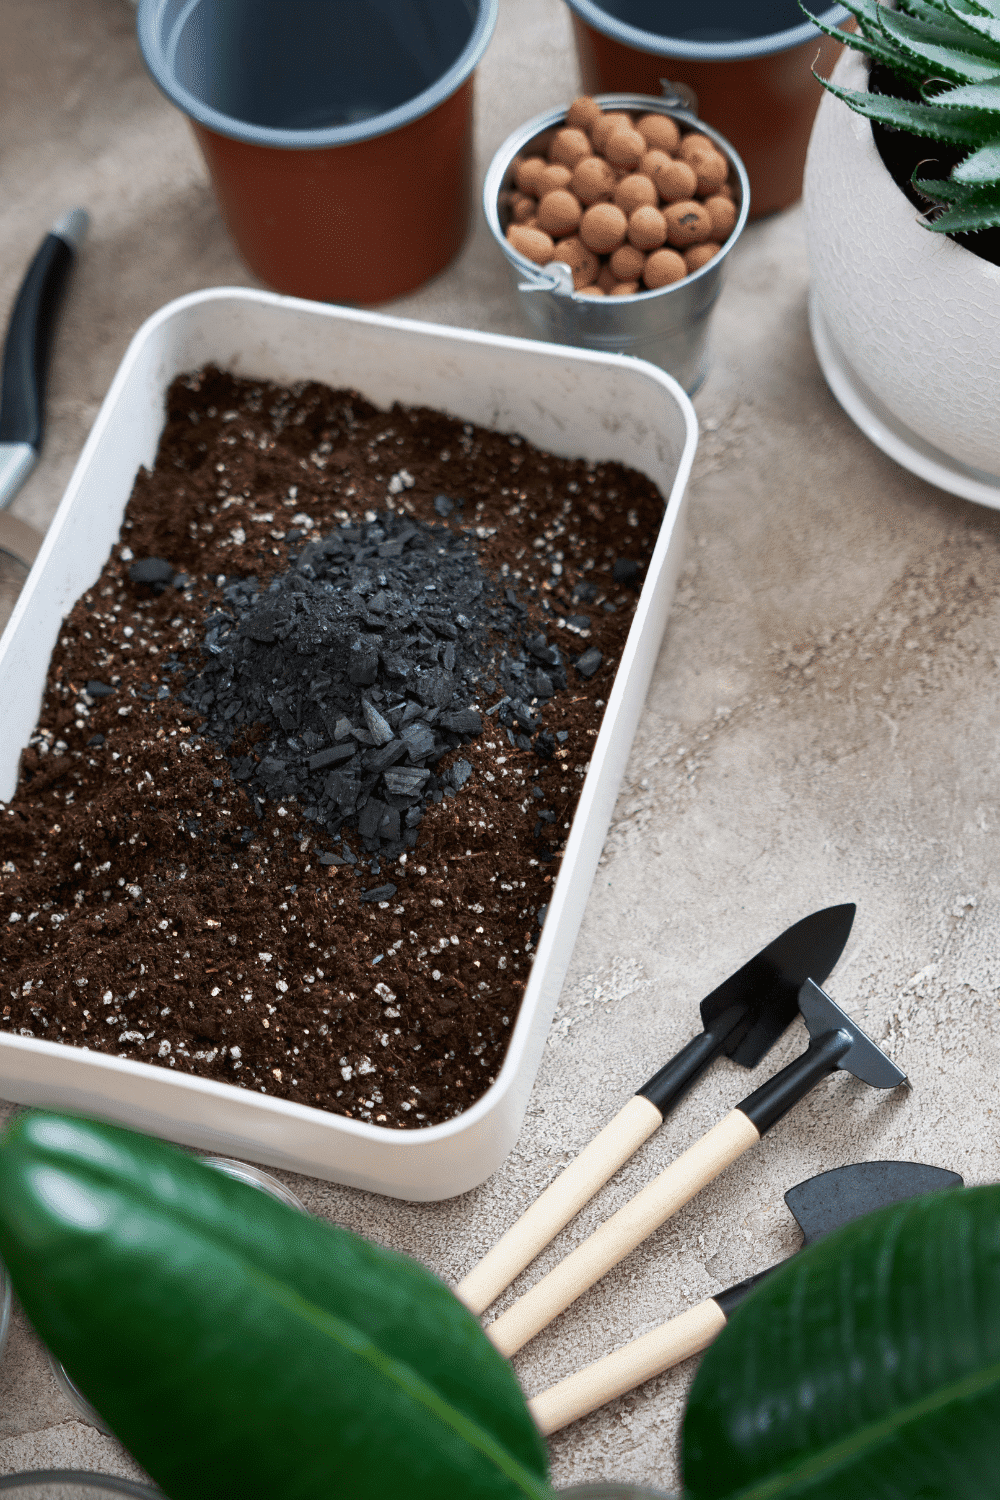
Compost: Compost is the primary ingredient in compost tea. It can be made from a variety of organic materials, including plant matter, manure, and food waste.
Water: Water is used to brew the compost tea and helps to extract nutrients and microorganisms from the compost.
Molasses: Molasses is often added to compost tea as a food source for beneficial microorganisms.
Worm castings: Worm castings, also known as worm manure, are a rich source of nutrients and beneficial microorganisms.
Seaweed: Seaweed is a natural source of micronutrients and can be added to compost tea to boost its nutrient content.
Rock dust: Rock dust is a natural source of minerals and can be added to compost tea to improve soil fertility.
Overall, compost tea can be made using a variety of natural materials, depending on what your garden needs. If you want to learn more about fertilizing and knowing what your plants need, this fertilizing course will be helpful in understanding these basic things.
What are the benefits of compost tea?
One of the benefits of compost tea is that it contains a wide range of nutrients that are essential for plant growth, such as nitrogen, phosphorus, and potassium. These are the most important nutrients in the garden for your plants to thrive. By creating compost tea, the nutrients are made into an easier-to-digest formula for your plants to take in and to be added more directly into the soil.
Compost tea is also rich in beneficial microorganisms such as bacteria and fungi, which can help to suppress harmful pests and diseases and promote healthy plant growth. By adding these microorganisms to the soil when compost tea is applied creates a natural and sustainable solution to common gardening problems.
Another advantage of using compost tea is that it is an environmentally friendly alternative to chemical fertilizers. Many home gardeners are worried about adding fertilizers, which makes sense because chemical fertilizers can not only cause runoff of chemicals because they can be applied too heavily where the soil and plants cannot ingest them.
To make compost tea, gardeners can use a variety of composting materials, such as plant matter, manure, and worm castings. These materials are added to a container of water and allowed to steep for several days, during which time the water absorbs the nutrients and beneficial microorganisms from the compost.
How to make compost tea:
The recipe for compost tea can vary depending on the specific materials and equipment being used, but here is a general recipe for making compost tea:
Ingredients:
5 gallons of water
1-2 cups of compost (made from plant matter, manure, or worm castings)
1-2 tablespoons of molasses (optional)
Equipment:
A large bucket or container
An aquarium pump with tubing and air stone (optional)
Cheesecloth or a fine mesh bag for straining (optional)
Instructions:
Fill a large bucket or container with 5 gallons of water.
Add 1-2 cups of compost to the water.
If desired, add 1-2 tablespoons of molasses to provide a food source for the microorganisms.
Stir the mixture well to combine the compost and water.
If using an aquarium pump, connect the tubing and air stone and place the stone in the bucket to aerate the water. If not using an aquarium pump, stir the mixture vigorously for several minutes to introduce oxygen.
Cover the container with a cheesecloth or fine mesh bag to prevent debris from entering the tea.
Let the mixture steep for 24-48 hours, stirring occasionally or keeping the pump running to ensure aeration.
After steeping, strain the compost tea through the cheesecloth or mesh bag to remove any solids.
Dilute the compost tea with water if desired (1 part tea to 4 parts water is a common dilution ratio).
Apply the compost tea to plants as a foliar spray or soil drench, taking care not to over-fertilize. Unused compost tea can be stored in a covered container for up to a week.
Note: It is important to use caution when making and using this mixture to avoid contamination by harmful bacteria. Always use clean materials and equipment, and avoid using compost that has come into contact with meat, dairy, or pet waste.
How often should I add to my garden?
The frequency of adding compost tea to your garden depends on several factors, including the type of plants you are growing, the quality of your soil, and the dilution rate of your compost tea.
Generally, applying compost tea to your garden every two to three weeks during the growing season is recommended. This will help to maintain healthy soil biology and provide a steady supply of nutrients to your plants.
However, it is important to avoid over-fertilizing your plants with compost tea. Too much nitrogen, phosphorus, or potassium can lead to nutrient burn or other problems. Additionally, if you are using a particularly potent or concentrated compost tea, you may need to reduce the frequency of application.
To determine the optimal frequency of compost tea application for your garden, start by applying it every two to three weeks and monitor your plants closely for any signs of over-fertilization or nutrient deficiency. Adjust the frequency of application as needed based on your observations.
Once the compost tea has been steeped, apply to plants.
In conclusion, compost tea is a natural and sustainable fertilizer that can help gardeners and farmers to grow healthy plants and improve soil health. By incorporating it into their gardening practices, growers can reduce their reliance on chemical fertilizers and create a healthier, more environmentally friendly garden or farm.
Learn more about soil health
You can learn more about our methods and ideas on soil health by checking out our soil course on our community platform focuses on helping you become a more confident gardener.
When it comes to keeping tabs on your beloved chickens, the struggle is real. Thankfully, the Chicken Coop Cameras are here to rescue us from this challenge.
This high-tech device will bring a whole new level of convenience to your poultry farm. You’ll be able to see what’s going on in the coop from anywhere and at any time. Now no more running around trying to ensure the safety of your flock, as you can monitor their every move with ease.
With the wide selection of camera products available, it can take time to determine which one is suitable for you. To help make this process less intimidating and more manageable, we’ve compiled a helpful guide on discovering the best Chicken Coop Camera.
In this article, we’ll review the top five chicken coop cameras and discuss their features, including image quality, night vision capabilities, motion detection technology, connectivity options, and more.
Whether you’re a novice chicken keeper or an experienced poultry farmer searching for dependable protection, this guide will provide helpful advice on how to pick the perfect camera for your requirements. We have all of your needs taken care of!
For anyone who owns chickens, the Blink Outdoor (3rd Gen) is an unbeatable choice. With its wireless design and two-year battery lifespan, you can rest assured that it will provide a tremendous amount of convenience. This is the best chicken coop camera available!
Plus, the camera has customizable motion detection that can be used to detect activity in your coop. Additionally, it is equipped with a 110° diagonal field of view, 1080p HD video resolution, as well as a 640 x 360 nHD photo resolution.
With its wire-free design, you can quickly move it around to get a better view of the coop. It also has Alexa integration so that you can control it with your voice. Its customized motion detection feature allows you to receive alerts whenever there is any motion in the coop.
WHAT WE LIKE
Blink Outdoor offers exceptional features for the price. This wireless, battery-operated camera is perfect for those who aren’t tech-savvy or don’t want to deal with wires. It’s easy to set up and requires minimal maintenance.
Plus, it has a two-year battery life, meaning you don’t have to spend too much time worrying about it. This camera also offers great features like Alexa compatibility and customized motion detection.
We love that Blink Outdoor is designed to be user-friendly. It has an intuitive app and easy-to-follow instructions, so you don’t have to be an expert to get it up and running.
Moreover, with its two-year battery life, you don’t have to worry about changing the battery every few months.
WHAT WE DON’T LIKE
The Blink Outdoor’s field of view is only 110° diagonal, which may make it hard to get a full view of the coop.
Additionally, it only has one blue LED that lights up whenever someone is at the door or when there is motion detected.
Lastly, it doesn’t have a night vision feature, so you won’t be able to monitor your coop after dark.
Those looking to keep an eye on their chicken coop from any location should look no further than the Zmodo Outdoor Wireless (2 Pack). Its 1080p full-HD nonstop monitoring and adjustable night vision mode provide crystal clear color images, even in low light conditions.
With this reliable device, you can rest assured that your poultry is safe. It is weather-resistant, so it can be used both indoors and outdoors to protect your home. It also works with Alexa so that you can control the camera with your voice.
In addition, it comes with a one-month free trial of Zmodo’s cloud recording plan, so you can review and save footage at any time.
WHAT WE LIKE
We love that this outdoor security camera is easy to install and requires no wires. With 1080p full-HD night vision, it provides day and night protection and can even detect motion up to 10m away with its PIR detecting distance.
Plus, it has a two-way talk feature that allows you to communicate with anyone on your property. Additionally, the local storage supports up to 128GB micro SD card, so you can store footage without a subscription fee.
Lastly, it has an IP65-certified weatherproof design, so you can trust that it will provide reliable protection even in the harshest weather conditions.
WHAT WE DON’T LIKE
The only downside to this camera is that its field of view is limited, and there are no features such as night vision or infrared. Additionally, it requires a power source, so it cannot be used without an outlet or battery.
PROS
1080p full-HD night vision
Weatherproof construction
Works with Alexa
Smart motion notifications
Temperature range of -10℃ to 50℃
Optional cloud service
Easy installation process
CONS
Limited field of view
Additional charge for cloud service after the free trial expires.
Siren (customizable), instant email alerts, and push notifications
WiFi Standard:
IEEE 802.11b/g/n
Operating Frequency
2.4 GHz
Power
Can be powered by Reolink Solar Panel or 5V/2A power adapter
Local Storage
Supports up to 128GB micro SD card
Operating Temperature
-10°C to 55°C (14°F to 131°F)
Weather Resistance
IP65 certified weatherproof
Features
No Wires Needed for Easy Installation
Day and Night Protection in 1080P Full HD
Real-time Alert with Accurate Detection
Record With No Subscription Fee
Family Account Share
No Hidden Costs
If you’re looking for a reliable security camera to guard your coop, look no further than the REOLINK Wireless Outdoor Security Camera! Its advanced features are sure to keep your home safe and secure.
With features such as no wires needed for easy installation, day and night protection in 1080p full HD, real-time alerts w accurate detection, and recording with no subscription fee, you can rest assured that your coop will be well-protected.
With a PIR detecting distance of up to 10m and a PIR detecting angle of 100° horizontal, you’ll get an accurate detection of any intruder.
Additionally, it comes with a built-in speaker and microphone for two-way talk and supports up to 128GB micro SD card for local storage.
Plus, with its IP65-certified weatherproof design, it can withstand the elements and still provide reliable protection.
WHAT WE LIKE
We love that this outdoor security camera is easy to install and requires no wires. With 1080p full-HD night vision, it provides day and night protection and can even detect motion up to 10m away with its PIR detecting distance.
Plus, it has a two-way talk feature that allows you to communicate with anyone on your property. Additionally, the local storage supports up to 128GB micro SD card so that you can store footage without a subscription fee.
Lastly, it has an IP65-certified weatherproof design, so you can trust that it will provide reliable protection even in the harshest weather conditions.
WHAT WE DON’T LIKE
The only downside of this camera is the limited field of view at 100° horizontal. If you need to cover a larger area, you may want to look for a camera with a wider angle. Additionally, this camera does not come with cloud storage, so you must purchase a separate service if you want that feature.
PROS
1080p full-HD night vision
Weatherproof construction
Works with Alexa
Smart motion notifications
Temperature range of -10℃ to 50℃
Optional cloud service
Easy installation process
CONS
Limited field of view
Additional charge for cloud service after the free trial expires.
Siren (customizable), instant email alerts, and push notifications
Features
Battery-powered and wire-free
Easy installation
Protect every corner of your home
Smart security
IP65 weather resistance
If you need a reliable, wire-free security solution, the Wyze Cam Outdoor Starter Bundle is your perfect option as a chicken coop camera! This battery-powered and wire-free camera can be mounted anywhere for up to 6 months of battery life on a single charge. Installation is easy with the Wyze app’s friendly step-by-step guides, and you can connect up to 4 cameras to a single base station.
It also has a PIR sensor that senses body heat for motion detection, and it has custom detection zones with options for person and package detection.
Additionally, this camera is IP65 weather-resistant so you know it will perform even in harsh conditions. All in all, this camera is a great option for reliable security without needing wires.
WHAT WE LIKE
The Wyze Cam Outdoor Starter Bundle is an ideal choice for those looking for a wire-free security camera. It has up to 6 months of battery life on a single charge and is easy to install with the Wyze app’s step-by-step guide.
We love the smart security features such as the PIR sensor that senses body heat for motion detection, custom detection zones with person and package detection, and IP65 weather resistance.
The best part? This product is not only cost-efficient but also does away with subscription fees for local storage. If you need dependable security and don’t want to be weighed down by wires, then this ought to fit the bill perfectly. As if that weren’t enough, it’s an extremely economical choice compared to other similar products on the market.
WHAT WE DON’T LIKE
The Wyze Cam Outdoor Starter Bundle has a fixed lens with a 100° diagonal field of view, so it won’t be the best option if you need monitoring from wide angles. Additionally, this product does not include cloud storage so this will be something you will have to purchase separately.
PROS
Battery-powered and wire-free
Easy installation
Protect every corner of your home
Smart security with PIR sensor and custom detection zones
Safeguard your chicken coop with the trustworthy and affordable Wyze Cam Outdoor Starter Bundle. You can install this security system effortlessly and enjoy the peace of mind it provides.
Battery-powered and wire-free, you don’t have to stress over complex wiring issues. Equipped with a PIR sensor as well as personalized detection zones for smart protection, its IP65 weather resistance ensures that it will work reliably in any climate condition imaginable.
WHAT WE LIKE
We love the Rechargeable Long Life Battery of this wireless camera that provides up to 1 to 6 months of worry-free use before needing a recharge. The 1080p HD picture quality and clear night vision will provide you with the perfect view of your home, while the two-way audio allows you to communicate with anyone around the camera.
The IP65 weather resistance ensures that the security camera will continue to work properly in any climate condition, no matter how harsh. This product is also backed by a 30-day money-back guarantee, so if you are not satisfied with the camera, you can return it for a full refund.
You will also receive free lifetime technical support, so if you ever have any questions or concerns, they can be addressed quickly and easily.
WHAT WE DON’T LIKE
The only downside to this product is that it does not come with cloud storage, so if you want to save footage or access it remotely, you will need to purchase an external storage solution.
Additionally, motion detection may be a bit too sensitive for some users as it can pick up on small animals or bugs.
Factors To Consider When the Best Chicken Coop Camera
There are several factors to consider when the best chicken coop camera for your home.
Video quality and resolution
It is important to make sure your camera has a high-quality image resolution in order for you to see what’s going on in the coop easily. This will allow you to spot small details and monitor your chickens from wider angles.
Night vision capabilities
You must make sure to purchase a camera with night vision capabilities so you can significantly monitor your chickens even in absolute darkness.
This way, criminals or predators won’t have the opportunity to sneak up on them unnoticed.
Motion detection and alerts
Equipped with a motion detection feature, you will be informed of any unexpected activity near the coop so that you can take immediate action to ensure your chickens’ safety.
Another key point, you can also make sure your camera has customizable zones for motion detection so you can customize the sensitivity of the alerts.
Weatherproofing and durability
The camera should be made from durable materials and have a waterproof rating of at least IP65 to protect it from rain, snow, and other extreme weather conditions. This will ensure that your camera can withstand the elements and continue to provide you with reliable service for years to come.
Wireless connectivity options
Ensure your camera supports both WiFi and Bluetooth connections to remotely access footage wherever you are, so nothing is ever missed. With this setup, you can be sure that all the action will be captured no matter where in the world you may find yourself.
Other benefits of using a chicken coop camera
Predator protection
Now safeguarding your chickens from predators is a breeze with an advanced camera that allows you to keep watch over them without ever leaving the comfort of home.
If any suspicious animals are detected near the coop, you will be immediately informed and can take action.
Behavior monitoring
A camera is a great way to understand your chickens’ well-being and guarantee that they’re content. Moreover, you can observe their actions and movements as well as spot any potential signs of uneasiness or sickness quickly so that you can act accordingly.
Egg production tracking
Installing a camera in your hen house allows you to keep track of your chickens’ egg production conveniently. You can observe their laying patterns and make sure that no eggs are overlooked, allowing for more efficient management of your flock.
Peace of mind for owners
Having a camera in the coop gives chicken owners peace of mind. Therefore, their chickens are safe and secure even when they can’t be there to monitor them.
Conclusion
To sum it up, investing in a camera for your chicken coop is both essential and beneficial when caring for your feathered friends. The extra security it provides will ensure that your chickens remain safe from predators and other dangers.
The advanced features give you the ability to monitor their behavior, egg production, and much more. You get peace of mind knowing that your chickens are safe even when you can’t be there to watch over them.
We hope this article has provided you with all the necessary information to help you choose the best camera for your chicken coop.
If you liked this article about the best chicken coop camera, consider checking out these other articles below —
Looking for day-to-night outfit ideas that don’t require buying a whole new wardrobe? The secret is knowing how to transform what you already own—like taking your favorite daytime dress and turning it into an evening-ready…
Spring is here, and it’s the perfect excuse to refresh your wardrobe with light, airy, and stylish pieces. Whether you’re dressing for brunch, errands, or a special occasion, these spring outfit ideas will help you…


 – wireless, weather-resistant HD security camera with two-year battery life and motion detection, set up in minutes – 5 camera system")
, 1080p Full HD Home Security Camera System, Works with Alexa and Google Assistant, White (ZM-W0002-2)")

, 1080p HD Indoor/Outdoor Wire-Free Smart Home Camera with Night Vision, 2-Way Audio, Works with Alexa & Google Assistant, White with Camo Skin")


 – wireless, weather-resistant HD security camera with two-year battery life and motion detection, set up in minutes – 5 camera system")
 – wireless, weather-resistant HD security camera with two-year battery life and motion detection, set up in minutes – 5 camera system")
 – wireless, weather-resistant HD security camera with two-year battery life and motion detection, set up in minutes – 5 camera system")
, 1080p Full HD Home Security Camera System, Works with Alexa and Google Assistant, White (ZM-W0002-2)")
, 1080p Full HD Home Security Camera System, Works with Alexa and Google Assistant, White (ZM-W0002-2)")
, 1080p Full HD Home Security Camera System, Works with Alexa and Google Assistant, White (ZM-W0002-2)")


, 1080p HD Indoor/Outdoor Wire-Free Smart Home Camera with Night Vision, 2-Way Audio, Works with Alexa & Google Assistant, White with Camo Skin")
, 1080p HD Indoor/Outdoor Wire-Free Smart Home Camera with Night Vision, 2-Way Audio, Works with Alexa & Google Assistant, White with Camo Skin")
, 1080p HD Indoor/Outdoor Wire-Free Smart Home Camera with Night Vision, 2-Way Audio, Works with Alexa & Google Assistant, White with Camo Skin")